Showing posts with label vintage. Show all posts

Thursday, 1 March 2018

Wax Lyrical at Stamps and Stencils

Hi everyone, it's time for our next challenge at Stamps and Stencils and Sue is our lovely host....and we are playing with wax this month! Here in her own words is what she wants us to do.

' I have long been fascinated with the subject of Encaustic Artmelting wax to create many layers and trapping pieces of fibres and papers between the layers of melted wax just seems magical to me. So for this challenge I want to see some wax on your projects, whether it's just dribbled, melted and then stamped into or a wax embellishment as long as you include some stamping or stencilling the choice is yours !'


My first inspiration post at Stamps and Stencils was about wax and had some basic information you can refer to link here. This time I thought I'd try and explore wax on paper and the wonderful 'transparentizing' effect it can have. I thought this could be a good starting point without expensive supplies to tempt and inspire you to just dabble with your melt pot, a little beeswax and paper.

I made some eco leaf prints with autumn leaves last year which I hope to blog about it at some stage. I chose one of the pieces that I  thought could be enhanced with some stamping before coating with encaustic medium. Firstly I've added a lovely quote from one of  Alison Bomber's word plates.


Now some stamping to compliment what is already there.


When you first put the wax on it will sit on top. Fusing and another coat later it will start to sink into the paper. Normally you should have a solid heat resistant base such as wood or encaustic board; if I had made it on canvas it would sit on top and crack but handmade paper or good quality watercolour paper will absorb some of the wax and won't crack....unless you choose to crumple it up or fold it of course!


I've added a few drops of white encaustic medium. 


I also used a stencil and some gold leaf rubbed through it. If adding leaf metal or mica it must always be on the top layer if you want to keep the shine.


One of the things I love about encaustic are the depth of layers created and how the wax softens everything.


I'm hoping you can see the lovely sheen you get with encaustic when 'polished', I used a nylon pop sock to buff it.


The frame is painted with chalk fresco and a touch of treasure gold and moss green ink. I used a double sided tape sheet to stick the paper to the wooden frame back and chose not to use the glass that came with it.


There are lots of lovely and inspiring ideas from our DT of how to incorporate wax into your projects over on the blog. Hop across and checkout their posts and can't wait to see what you create!

Ruth x

Thursday, 1 February 2018

Off to Collage at Stamps and Stencils!

Hi everyone, Cec is our lovely host for this months challenge... here's what she wants us to do.

'No I am not sending you to school but thought it might be fun this month to make a collage.  You can use any substrate such as canvas, corrugated cardboard, wood, or canvas boards for instance and add any items to it as long as you include some stamping and/or stenciling.'

So I've created a little wall hanging in vintage tones, with lots of layers.


'Collage  - a piece of art made by sticking various different materials such as photographs and pieces of paper or fabric on to a backing'.

I've gone for a slightly different take on this and  decided to go down the using up scraps route and make a collaged background. Taking a cue from Cec, I had a piece of cardboard lying on my desk and that's where I started. Tweezers to rip a few holes in the base and then I've glued down some book text.


Layering all sorts of scraps as a backdrop and then I decided the focal point would be a small photo frame with something in it...at this stage I wasn't sure what though!


As all the items I was using were neutral tones, I decided to keep to that colour theme and just use a little gesso to tie them together. Lots of dry brushing on the outer edges and a little more centrally. I masked off the framed area so that when I added the image it would stand out.


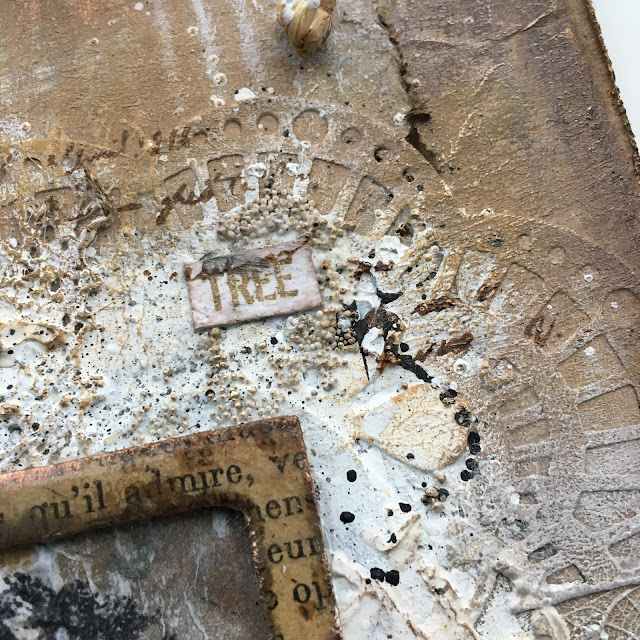
Love how dry brushing highlights all the texture. Add in some micro beads (art stones), grunge paste through a stencil and the main image (Crafty Individuals) stamped on tissue before gluing down.


Love this effect, it gives such depth to the piece and because it is straight over the collaged elements it fits in perfectly. Some stamping in potting soil archival and paint splats.


More dry brushing in shades of brown (toffee, chocolate pudding and stone) to highlight the texture.


The frame was altered by covering with book text, adding 2 layers of clear UTEE and a tickle of treasure gold.


I enjoyed doing this so much I want to do another one!


Hope you'll join in with our challenge and if you need more inspiration hop across and see the wonderful samples from our very talented creative team! Happy creating! Ruth x

Thursday, 5 January 2017

Swirls, Whirls and Flourishes at Stamps and Stencils

Happy New Year to you all, I'm kicking off the first challenge of the year over at Stamps and Stencils and I've chosen Swirls, Whirls and Flourishes! There are such a variety of stencils, stamps, embellishments in these designs and they are so versatile that I thought it would be fun to incorporate them somewhere in a creation of your choosing. I've had some chipboard flourishes for a while and chose to incorporate them in a little canvas I'm going to have sitting on my craft space. This year I'm going to keep positive by looking for the Joy in things.


Very grungy...a bit like January really, except there is some bling if you look closely and lots of texture .


I started off with a small 7 x 5 canvas that I added some mod roc or plaster bandage to the edges. Using Teresa Green and Chartreuse fresco paints I lay some colour onto the background.


I've added stamping and used a flourish stencil with embossing and grunge paste. Some prima blooms drips in Teal were added.


A little crackle paste was added and then I started to alter the mdf shapes, a little while later I've added micro beads, glitter, drips of watercolour... I also used a green and a raw umber glaze letting it seep into the cracks before wiping back. Basically I just had fun adding and taking away. Although I liked the monochrome palette I decided a little contrast was needed in purple.


I'm always surprised how things turn out, rarely anything like I originally thought...they evolve and I guess that's the beauty and yes the joy of creating.


Thanks so much for stopping by, I do hope you'll be able to join in with our challenge and please do hop across and see what the DT have created to inspire you, there really is some yummy eye candy!

R x

Friday, 18 November 2016

'Cracking Up' at A Vintage Journey

Hi everyone, today I have 2 posts to share with you, first up I'm part of the pinworthy inspiration post over at 'A Vintage Journey' for this months challenge theme which is all about luscious crackle. I decided to use lots of lovely decoart crackle paint to create the texture and used clear crackle on the vial.


To start I used some tissue tape over the edges of the canvas and then gave it a coat of sage fresco paint.


Next I used a palette knife to apply the crackle paint to give fine crazing and large cracks.


Once dry, I applied the burnt umber antiquing cream...


and rubbed it back with a damp wipe.


This is to show the before and afters, some of the embellishments were quite near the bronze colour I was after, but others needed a bit more paint and antiquing.


Lastly assemble it, add a little treasure gold over the embellishments and crackle....


..and a little stamping of fine text around the niche...


I think this shows the lovely variation in crackle


Final close up


I was delighted to be nominated and I want to thank the team for inviting me. I really enjoyed creating this...sometimes things just come together very pleasingly. Hope you get chance to join in and for more inspiration pop across and see what the other pinworthies have created....as always thanks for stopping by x

Sunday, 30 October 2016

Catch up...

Hi everyone, thought I'd squeeze in a post before the end of the month and share a few things that I've made recently. Some items I've already shared peeks of via social media but I'm starting with some encaustic panels I made months ago but realise I hadn't posted yet. I am now wanting to play with wax again...

Pan pastels and wax, I'm so pleased with how this turned out, some dry brushing of coloured wax is then given a top layer of pan pastel through a stencil.


PVA glue through a stencil and burnt, there is a bit of a story to this one revolving around my cooks blow torch being temperamental and it didn't go quite to plan so I decided to finish off with a shellac burn (for explanation of this technique please see links in side bar to previous wax posts)


Stencilling and scoring into wax before dry brushing.


Next I recently attended a Lin Brown workshop which involved lots of painty fabric play and stitching....as always it was brilliant.


 some detail photos


Lastly I attended a France Papillon workshop last year and one of the creations I made was a 'Grimoire' or an ancient book of spells. It's made of handmade papers, book text and maps and I've not wanted to write in it or use it because I've struggled to find something which I think is suitable for it....until now


A scrap piece of book paper which I'd been using to wipe my paint brush seemed perfect for a little snowflake paint as a base to then stamp on.


Lin Brown's new stamps in sepia, some stitching and fragments of heat embossed skeleton leaves  just fitted in perfectly to me.


Thanks for stopping by x

Thursday, 6 October 2016

Elements of Nature at Stamps and Stencils

Hi everyone, 'Elements of Nature' is our next challenge over at Stamps and Stencils this month. Autumn is our talented host this time around and here's how she describes her challenge. Whether you are inspired by the glorious world around us with the changing seasons, or tempted to use elements of nature in your art work, this month we'd love to see your nature inspired entries.  Anything goes as long as you include a natural element in your art which can be either stamped or an actual item!  As always you need to include stamping or stenciling.

This is my take on a herbarium - 'a systematically arranged collection of dried plants'...with a good sprinkling of artistic license thrown in!


I started off by removing the glass from a cheap frame from the Range and found some book text paper which just fitted in the background. I used versamark through a stencil and clear embossing powder on the paper. This gives the paper a translucency showing the text on the other side.


I washed a coat of zesty zing fresco paint over it and dried it. The frame was white so I painted it black and heat embossed a leaf image in gold all over it before aging with more black fresco paint and a tickle of treasure gold.


Next I used a leaf stencil with snowflake paint all over the background....


...before 'bump' stencilling in shades of green over the same area.


Next a walk with the dog to pick some seedheads from a plant that I know as cow parsley (not to be confused with hemlock, which does look similar). Colour them with gold sprays and embossing powder.


To alter the skeleton leaf I stencilled versamark through a stencil before carefully heat embossing in gold. Some white and brown ink splashes to age the piece and stamped identification labels finish this exhibit...


Please hop across and see what the talented team have created and hopefully inspire you to join in with the challenge. As always thanks for stopping by x