Showing posts with label ATC's. Show all posts

Monday, 25 July 2016

Shadow Box Frame at PaperArtsy

Hi everyone, I'm sharing a project over at the PaperArtsy blog tonight that I had great fun making. It's the start of a new theme, all about colour mixing. I made a shadow box and here's a little peek.


Hope you'll hop across to see how I made it and what I discovered along the way. R x

Sunday, 31 August 2014

ATC's

No apologies for this current addiction.... it's the return of the faded layers technique that I loved doing so much for CC3C. I've repeated the light stone effect for the background of these ATC's. (I am definitely in a phase of vintage brown and neutral coloured posts at the moment!)


Over at  'A Vintage Journey' it's a 'A little touch of Tim' ATC challenge.


Once I'd got my background ready I built up the layers using the script stamp from the Mercantile set and a miniature flourish from another set of Tim's.


Next tissue tape, torn thrift shop vellum, ribbon, mini clips and film ribbon, then some Wendy Vecchi crackle paste through the bubble stencil. Finally some butterfly stamps from the sewing/haberdashery set in potting soil archival and chit chat stickers finished with gathered twigs DI.


Finally a close up of faded layers with bubble stencil....love it!


Hope you enjoyed this and thanks so much for stopping by.

Saturday, 16 August 2014

Time flies...

oops 2nd attempt to post!

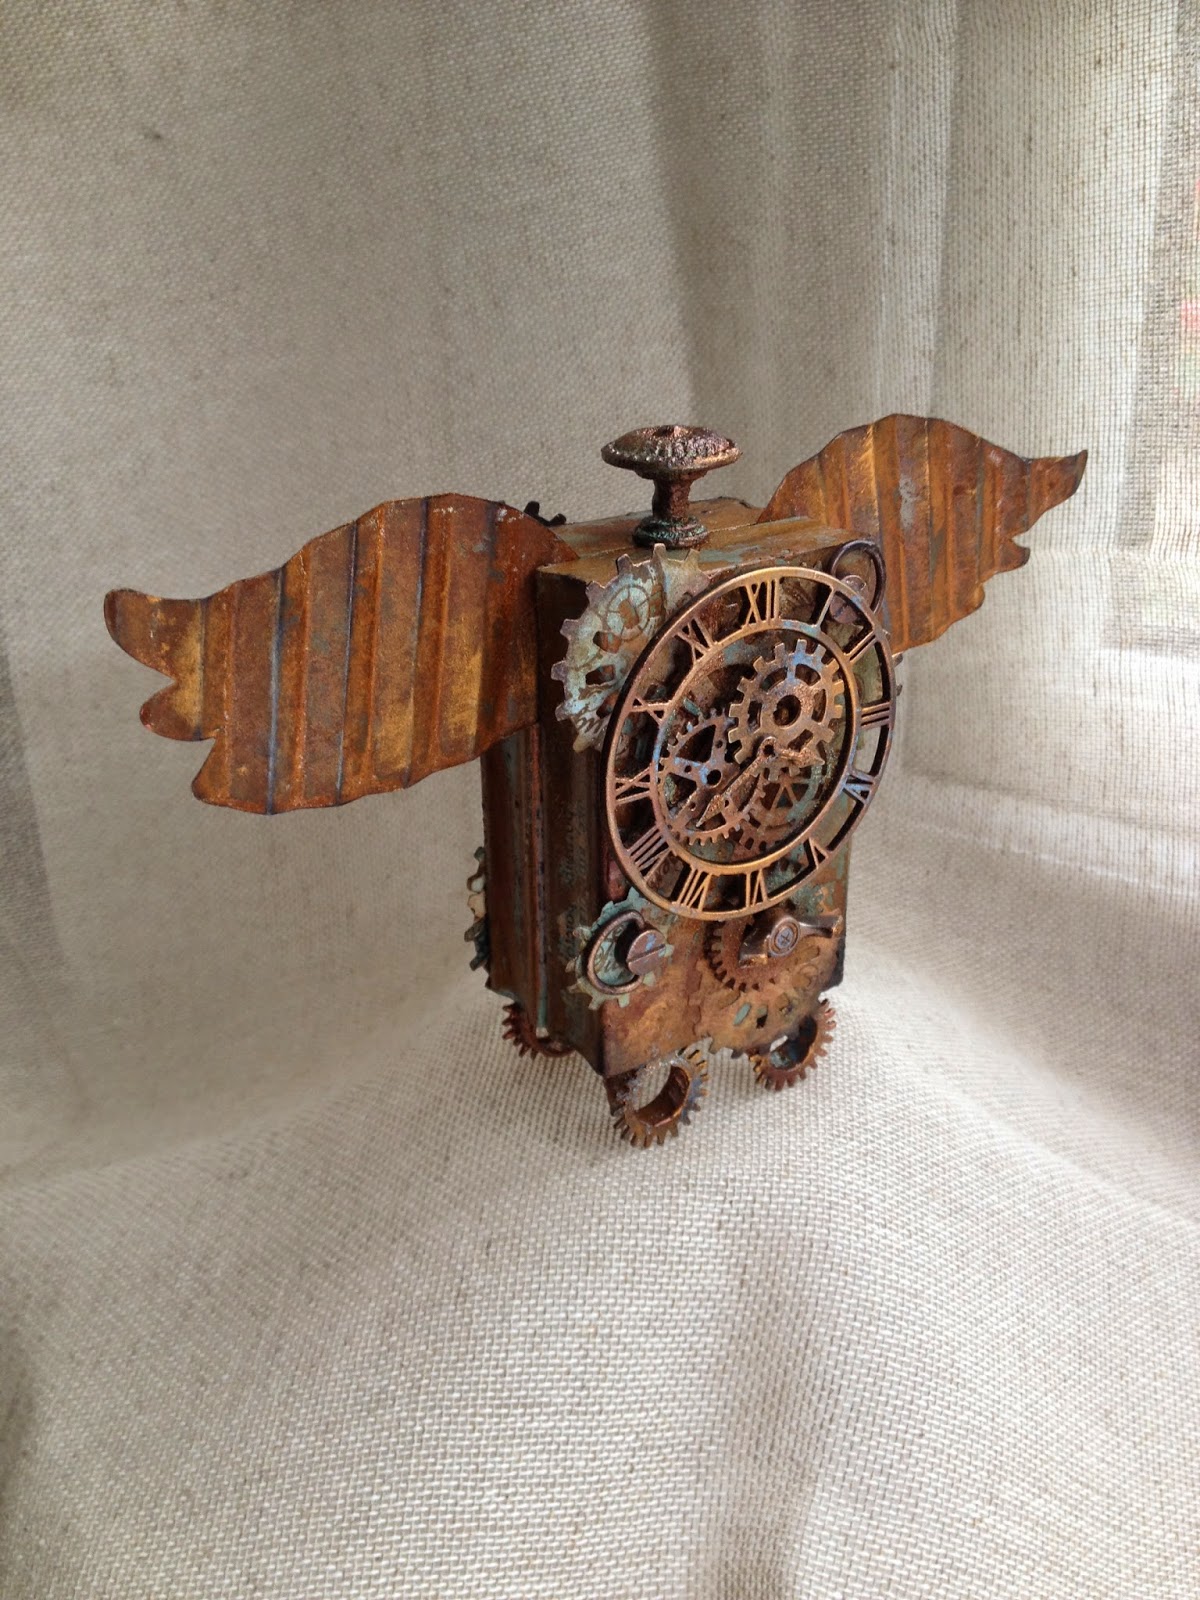
A few months ago I mentioned I'd been trying to make a chunky ATC for one of the challenges but that Mr Mojo decided to leave the building, and so he has been sitting there forlornly looking at me from the corner of my work space ever since. However here he now is in all his rusty grungy glory (not sure why he is a he but he is).  Hopefully he will now sit happily on my shelf stretching his rusty wings.


He started off as two wooden stamp mounts (I decided to turn some of my wood mounted stamps into unmounted stamps, but I kept the wood of course). I knew I wanted him to have rusty wings and then a couple of challenges came up that inspired me and pushed me into finishing him. The blocks still had some remnants from my first attempt so I covered the blocks with terminology tissue wrap.


I used broken china and antiqued bronze distress paints for the eroded metal effect of Tim's and wanted to continue this effect throughout.


I already had these die cuts and circles in my stash and the colours just lent themselves to the project. I stamped in potting soil archival on both with some craft stamper free stamps, one is appropriately 'Tempus fugit' (time flies).


Part way through assembly. I've used paper and metal embellishments. I've also used verdigris, black and copper embossing powders, black archival and treasure gold in florentine, spanish topaz and onyxite. 

Some close ups of his rusting body.


Over at 'A Vintage Journey'  they celebrate all things Tim influenced and it definitely is inspired by his vintage grungy approach and techniques, just hope it's eligible. I'm entering for the first time, it's only their 12th challenge!...although I've followed it, I've just not been able to enter before; the theme this time around is of course...'Time Flies'

I'm also pleased to be able to enter one of  SanDee & Amelie's Steampunk challenges for the first time as well. This time it's for the Summer bonus challenge which is based on a mood board, I think I've used virtually all the colours and the corroded metal cogs and gears but just lightened with a bit of blue.

Lastly I'm entering it in the Craft Stamper Take It, Make It August challenge , this month the challenge is to use any of the techniques demonstrated in Craft Stamper this year so far. From June 2014 I've used the eroded metal effects (Distress to Impress) but from the same issue I also used the blistered paint technique (Blistering Barnacles) on some of the metal work and was inspired by Trish Latimers masterclass on inventive feet. I enjoyed doing it... and that's all that matters, thanks for stopping by and hope you enjoyed the post.

Tuesday, 25 March 2014

Hogwarts staircases and ATC part 2

What??.....well one of the blogs I follow is Barbara Gray's Blog and if you haven't seen her first post then this link sums up how starting a blog feels or put another way it's like trying to navigate the 'Hogwarts staircases.' You think you know where you are going and then you end up somewhere else, you may find something you weren't looking for and want but you'll never find your way back to it again. I still haven't worked out how to load blinkies and gadgets like my Pinterest link, sort  my background picture out properly and many other things....but I know I will.
So I just thought as I am late posting the ATC part 2 I'd take the opportunity now to explain why and apologise for any future slips and trips.

ATC part 2 


I 'ruined' the original paper with too much paint but then thought nothings really ruined, it's just going in a different direction, some distressing and it's a background to work on.


2 ATC's doesn't make a series ( is it 9 officially?) so make some more.


...but you can't repeat accidents, and  lovely as it is there was too much ginger peach primary elements.  


Some more  painting and distressing later to tone them in.


Collage elements


chit chat stickers


Glass bead gel on 3 of them. Inspired by Lin Brown I remembered I had some and although the stamped flower underneath has faded I like the effect. A little treasure gold to highlight.


I like the effect of Wendy Vecchi embossing paste here (Sue Carrington post) but I haven't got any so on the remaining 3 used some Viva clear croco I had instead.


Just a couple more photos to finish. Hope you enjoyed it, thanks for dropping by.