Showing posts with label tins. Show all posts

Thursday, 7 April 2016

From Trash to Treasure at Stamps and Stencils

Hi everyone, welcome to our next challenge over at Stamps and Stencils. It's the turn of the very talented Autumn to host and here in her own words is the new theme.

 Don't we all love a good upcycled project?  This month we'd love to see how you take something that you'd normally discard and give it new life in your art.  Whether it's glamorized boxes, Styrofoam turned into a stamp, packaging that's been die cut, or another altered idea you have.  Bring on your best mixed media repurposing!  We can't wait to see what you come up!  Don't forget to use stamps or stencils in your project.


Some of you may remember me altering some tiny tins in the past, the first had a sewing theme and the second had a flower and butterfly theme. Towards the end of last year I was lucky enough to find another tin and I have been wanting to alter it in a Steampunk style ever since but never quite got around to it...until now. What a perfect opportunity to turn trash into treasure and at the same time complete my trio of tiny tins.


I've explained how I've prepared the tins in my previous posts but just wanted to show you their size.


The ingredients.


I used distress and archival inks to create the inserts. Some tissue tape and vintage photo distress embossing powder created the card band for the outside.


Crunchy wax Kraft paper was put through an embossing folder and then I used treasure gold to create a patina.


Then it was just a case of layering up inked, gilded and rusted embellishments until I was happy. The insides.


Quite a few layers in the base.
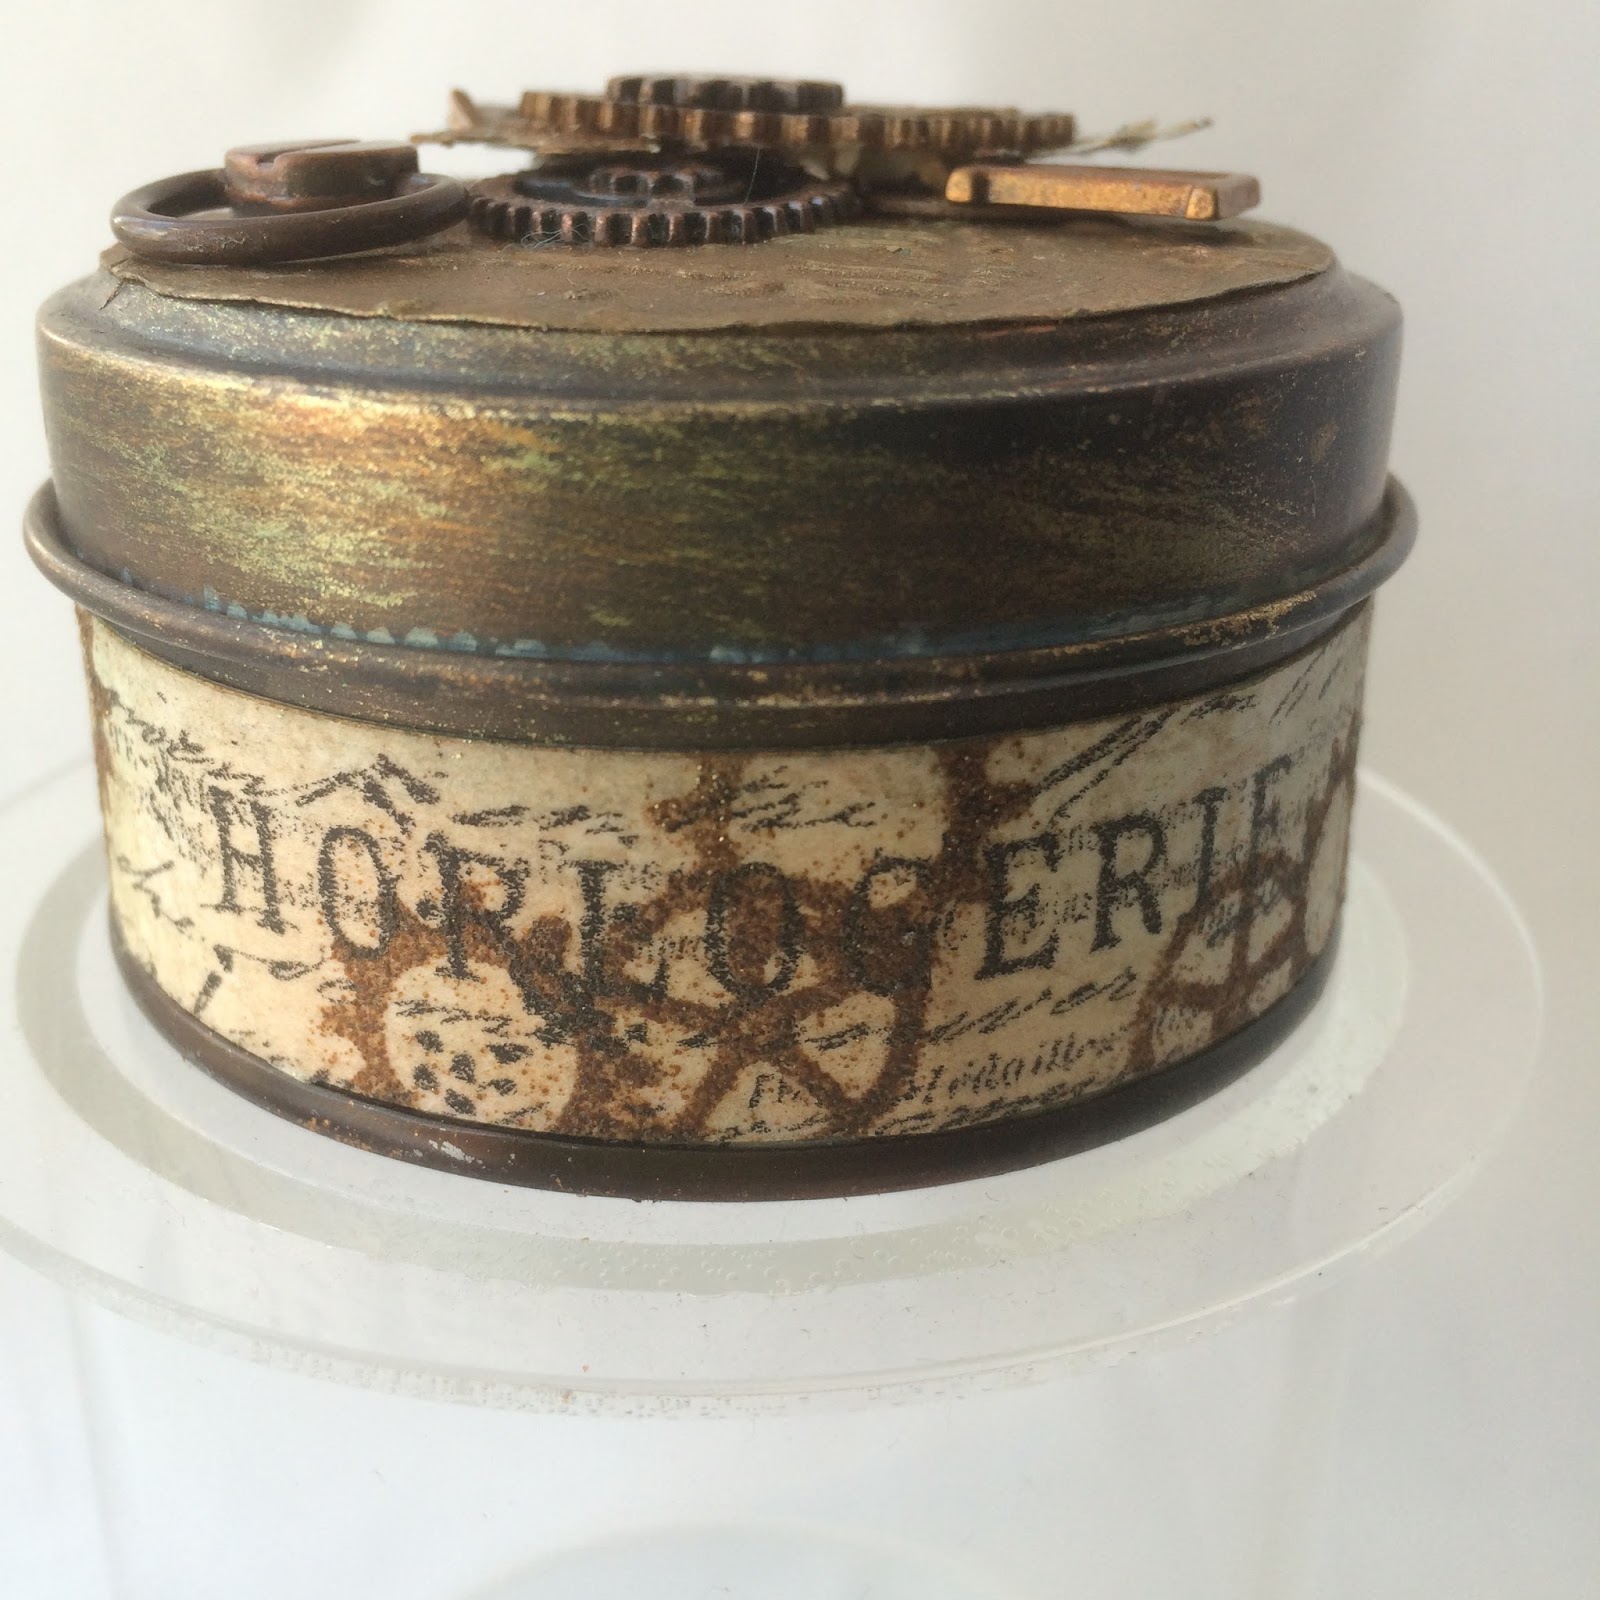

A side view


and finally with the lid back on hiding it's contents.


To finish I thought I'd share the trio with you. A reflection of some of my favourite subjects all with a vintage flavour.


As it is a Steampunk tin I'm also going to take the opportunity to join in with SanDee&amelie's Steampunk April challenge. 'Anything Goes' - Steampunk/Industrial

Thanks for stopping by and don't forget to hop across to see what the rest of the talented design team have created to inspire you. Can't wait to see what you'll turn into treasure!

Thursday, 1 October 2015

Blog Hop and new challenge at Stamps and Stencils!

Hi everyone, it's time for our next challenge at Stamps and Stencils and as it's our 6 'monthaversary' we're also having a blog hop. If you've arrived here from Yvonne's blog you're in the right place... if you haven't and you want to join in then hop across to Stamps and Stencils for the details. There's also a PaperArtsy giveaway for one lucky hopper!

On to this months challenge then, Sue our talented DT lead is our host this time around and the theme she's chosen is 'Whatever it is make it 3D!'. Here's my altered tin.


I decided to alter an old tin I picked up in a charity shop that I thought had an interesting shape and set about burning it ...see this post for more details. 


You can just about make out the original design on the lid which was oriental in look and in quite garish colours. However the sides post burning I just fell in love with...happy accident!


Building on that I decided to use alcohol inks sponged over the tin with more on the top than the sides.


I didn't want to add anything more to the tin itself and decided I'd have fun creating a floral embellishment for it.


Stamps and stencils were used on a variety of surfaces.


This is PaperArtsy crunchy waxed Kraft paper with silk glazes brushed on top and heat set...I've used paint before and it doesn't blister just seals it it, but the glaze was another happy accident ...love the blistered effect.


The reverse of the paper with primary elements sprayed and heat set, this won't rub off now, plus some archival stamping.


This is white  Khadi paper (cotton rag paper) sprayed with black glimmer mist (another lost and found product since my craft room makeover) with burnt umber primary elements mixed into 3D gloss gel.


The last surface is clearly for art film stamped with the bubble stamp. I used the tattered florals die to create my flower just layering up and adding some mica flakes to the centre.


This was one of those projects that was a joy to create, happy accidents, quite simple and just came together beautifully.


 The inside which is how I expected the outside to initially look...not sure what I'm going to store in it yet!


 A few detail photos.


Hope you'll be inspired to join and hope you'll hop across to Julia's blog, but before you go you also need a letter from me which is 'C'. 

As always thanks for visiting... Ruth x

Friday, 13 March 2015

Guest Creative Guide at 'A Vintage Journey'

Hi everyone,  I was lucky enough to win a recent challenge over at 'A Vintage Journey' and as part of the prize I was invited to be a guest creative guide and create a piece for their latest 'anniversary' challenge. If you hop across here...you'll find out a little bit more about me, my Tim influences and there's also a rare photo of a young me!


Here are some close ups of the top and sides of my Tim Technique Tin....


'A Vintage Journey', this brayered embossing technique is one of the first I saw on Tim's dvd 'An Altered Journey' ....I've used butterscotch, ginger and hazelnut Alcohol Inks, some texture tools over the metal and a hint of blue treasure gold.


For the sides I started off with some mixed media paper and 'spritz and flick distress'


The heart and wings are grungeboard elements and I've used crackle paint and vintage photo distress glitter.


I do love this cobalt blue shade of archival ink, and I've stamped on the flower as well. I've also used gilded glassine paper to mount each piece of card on.  


A little rusty grunge board and ephemera.


A little crackled butterfly. Top right is the shabby chic technique from CC vol 1 and you can't really see but I used the 'perfect distress' technique on the text stamp from the first CC vol as well. 

Hope you enjoyed this post and get the chance to join in with the 'anything Tim' challenge. Thanks as always for stopping by.

Friday, 23 May 2014

Tiny Tin...take 2

Yes, when I made the first  tiny tin I already had an idea for a butterfly themed second one...add in the CC3C technique of distress glitter and the 'Sunday Stamper Challenge' of Brown and Blue and here's the result.


Apart form the touch of blue to lighten the project I wanted to keep to neutral tones so I've used pumice stone, vintage photo and black soot distress glitters. For the kraft glassine flowers I've used the 2 smallest sized tattered florals die. After scrunching up, I used touches of the 2 distress paints below and brushed with perfect pearls. Hopefully you can see the various stages of the flowers below.


The movers and shapers butterfly is cut from clearly for art modelling film, a butterfly stamped on in black and I just used glitter on both sides (no paint or ink) so it would still have transparent areas. I then heated the butterfly to mould it. The smaller butterfly inside was stamped and then scissor cut.


I've used chit chat stickers and remnant rubs inside and outside. To add some extra reflection inside the base as it's deep, I used a piece of very thin extra sticky tape (approx 1/8th inch) just inside the rim and sprinkled it with more pumice stone glitter. 


As well as the Sunday Stamper Challenge which I have linked above, I am of course entering this in Compendium of Curiosities 3 Challenge, which this month, as it's an even numbered challenge is sponsored by 'The Funkie Junkie Boutique'.

I haven't any more tins, tiny or otherwise at the moment  and although I have really enjoyed making them they can be quite fiddly and time consuming so I will be quite happy making something a bit more straight forward......well more normal size anyway! Thanks for looking in.

Sunday, 11 May 2014

'Tiny Tin'

Liesbeth Fidder gave a wonderful tutorial of an altered sewing tin here on the PaperArtsy blog this week. It inspired me to have a go at altering a tiny tin that I have.


It's about 6cm or just under 2.5 inches across. I took pictures of the tins post burning on the kitchen hob, worked really well (Hazels tip, thank you). And yes I have another one I have other plans for now.


 I've used a mixture of 3 sets of sewing themed stamps that I have as I don't have any of the PA themed ones. Forgot to take any more photos until complete but the steps are virtually the same just with some adaptations because the tin is round, smaller and deeper than the original and presented a few challenges.


Inside the lid with a few tiny additions to add dimension and mirror the base.


The mini spool and glass vial add some depth, the spool has been aged with fresco paints and some treasure gold 'onyxite' used to age the shiny sewing machine and the prima metal embellishment on the lid.


The material was frayed and then scrunched up under the motifs and buttons as I realised that circles of fabric don't fray in a circle (!)...but I like the effect and I used a couple of layers of cruchy waxed paper to give more dimension.


I'm entering this in the PaperArtsy weekly challenge. Quite enjoyed producing a dinky something which is now sitting on my shelf not taking up much room....and that's always a bonus!