Showing posts with label sewing. Show all posts

Monday, 5 February 2018

Bobbin Book at PaperArtsy

Hi everyone, I always get excited when I have a post over on the PaperArtsy blog and tonight I'm sharing a little labour of love. I've made a mini book from a wooden reel that I've had in my stash and as serendipity would have it I'm combining some of the new Seth Apter paints (Set 3) with Alison Bomber's wonderful word plates.....I 'reely' enjoyed making this!


 Butter, Double Denim, Magic Moss and Blue Lagoon work beautifully together.


Hop across to the PaperArtsy blog for lots of photos. 

Lastly, I'm hoping this fits the bill for the February mini album makers challenge, it's on a spool but it's still a handmade book of sorts and it's certainly mini....


Thanks for stopping by. Ruth x

Sunday, 30 October 2016

Catch up...

Hi everyone, thought I'd squeeze in a post before the end of the month and share a few things that I've made recently. Some items I've already shared peeks of via social media but I'm starting with some encaustic panels I made months ago but realise I hadn't posted yet. I am now wanting to play with wax again...

Pan pastels and wax, I'm so pleased with how this turned out, some dry brushing of coloured wax is then given a top layer of pan pastel through a stencil.


PVA glue through a stencil and burnt, there is a bit of a story to this one revolving around my cooks blow torch being temperamental and it didn't go quite to plan so I decided to finish off with a shellac burn (for explanation of this technique please see links in side bar to previous wax posts)


Stencilling and scoring into wax before dry brushing.


Next I recently attended a Lin Brown workshop which involved lots of painty fabric play and stitching....as always it was brilliant.


 some detail photos


Lastly I attended a France Papillon workshop last year and one of the creations I made was a 'Grimoire' or an ancient book of spells. It's made of handmade papers, book text and maps and I've not wanted to write in it or use it because I've struggled to find something which I think is suitable for it....until now


A scrap piece of book paper which I'd been using to wipe my paint brush seemed perfect for a little snowflake paint as a base to then stamp on.


Lin Brown's new stamps in sepia, some stitching and fragments of heat embossed skeleton leaves  just fitted in perfectly to me.


Thanks for stopping by x

Thursday, 4 August 2016

'Time to Take Flight' at Stamps and Stencils

Hi everyone, well the last month certainly 'flew' by and now it's 'time' for our next challenge over at Stamps and Stencils....bit of a hint there...it's our DT lead Sue who is the host for this months challenge, here's what she has to say about it.

For this challenge I would like to see anything relating to flying, so this could be a bird or a butterfly or it could be an inspirational quote that includes words relating to flying ! As always, please remember we are a mixed media challenge and you must include either stamping or stenciling or both !


I've chosen to make a fabric page this month which will eventually form part of a fabric book. I first made one a few years ago on a wonderful Artsycrafts weekend which was a weekend workshop run by PaperArtsy....of which I have very fond memories. Although the base is fabric, this would work just as well on a canvas.

In looking around for inspiration, I was thinking about insects and came across a metal bee embellishment similar to one I'd used in my original fabric book. I thought it would be good to create another book and start by creating a fabric page....although in the end I didn't use the metal bee.


The Tim Holtz dragonfly was cut from some alcohol inked deli paper (from my Yupo post) which had been glued on to a music sheet.


The base was some green fabric and I stencilled the numbers with French Roast fresco paint. The Chapel Road bee stamp is stamped onto a gorgeous rust colured piece of silk and the lace was coloured with Infusions mixed with gum arabic to make it fast.


I then played around with the placement and decided I would stencil some Finnabair 3D transparent gel mixed with pear blossom primary elements onto the background. I then started to secure most of the elements in place by stitching.


A few microbeads and touch of treasure gold enhances the embossed dragonfly.


A little key and some stitching


Where would I be without buttons and lace...


To finish the edges of the cream canvas were zigzagged stitched.


Lots of things take flight, pop across to be inspired by my wonderful teamies creations and join in with our challenge!

Thanks so much for stopping by. Ruth x

Wednesday, 15 June 2016

Hessian Sampler at PaperArtsy

Hi everyone, I have a fabric themed project over on the PaperArtsy blog tonight for their new challenge. Hope you'll hop across to see what I've been up to....and here's a sneaky peek to tempt you!


As always, thank you all so much for stopping by, I truly appreciate it. R x

Saturday, 27 June 2015

Flora..

Following on from the 3 leaf cards I posted yesterday...a quick post to show the remaining 2 cards I made.


 I added some stamping and further colour to the flowers....


...and some gold embossing to the centres.


Edited...Just realised it qualifies for SOC here, so I'm linking the above card in!

This last card is a 21st...it may not be traditional but I hope she'll like it.


Thanks so much for stopping by, I read and appreciate all your comments. Hope you enjoy the rest of the weekend.


Friday, 26 June 2015

Baby wipes part 2

Hi, following on from my Stamps and Stencils post here, just thought I'd share a few of the CAS cards I made with the leaves...


below...


One of the lovely things about this is that you have a choice of the reverse, although blue leaves may be slightly odd!


All 3 cards have a milled lavender swiped background, some gold fab foil on to stamp and bond and a sentiment in spanish moss versafine.


I also added a little more colour to the leaves.


I tried to capture the shine from the foil...which is why they are all taken at the same angle.


I made a couple more cards in the same style using the baby wipe flowers and I'll post them tomorrow. Thanks for stopping by and enjoy creating!

Thursday, 25 June 2015

Baby wipe mini book at Stamps and Stencils

Hi, it's my turn for another inspiration post at Stamps and Stencils, so I hope you'll hop across and see how I made this mini book....and yes the covers are made from recycled baby wipes!


Thursday, 15 January 2015

'Exchange Day at ATP'

Hi, it's Exchange Day over at 'The Artist Trading Post' and my turn to share what I've been up to. I've been experimenting with acrylic pigment ink so please hop over here for all the details. Here's a sneaky peek!


Thursday, 8 January 2015

'Fresh Beginnings'

May I wish you all a Happy and Healthy New Year and welcome you to the first 2015 challenge over at ATP Exchange! Sue is our host and has chosen 'Fresh Beginnings' for this challenge...... Now that the festive season is over and thoughts turn to what lies ahead in the New Year, take a look through your craft supplies and share with us a new product/technique/ or even a new item to alter !


I bought a tub of Silk Clay just before Christmas from the Artist Trading Post and thought this challenge was the perfect opportunity to experiment with something new (who me...experiment?). I also used my new iridescent silk glazes (yummy) and some lutradur (or it maybe Tyvek?) that I purchased a while ago.


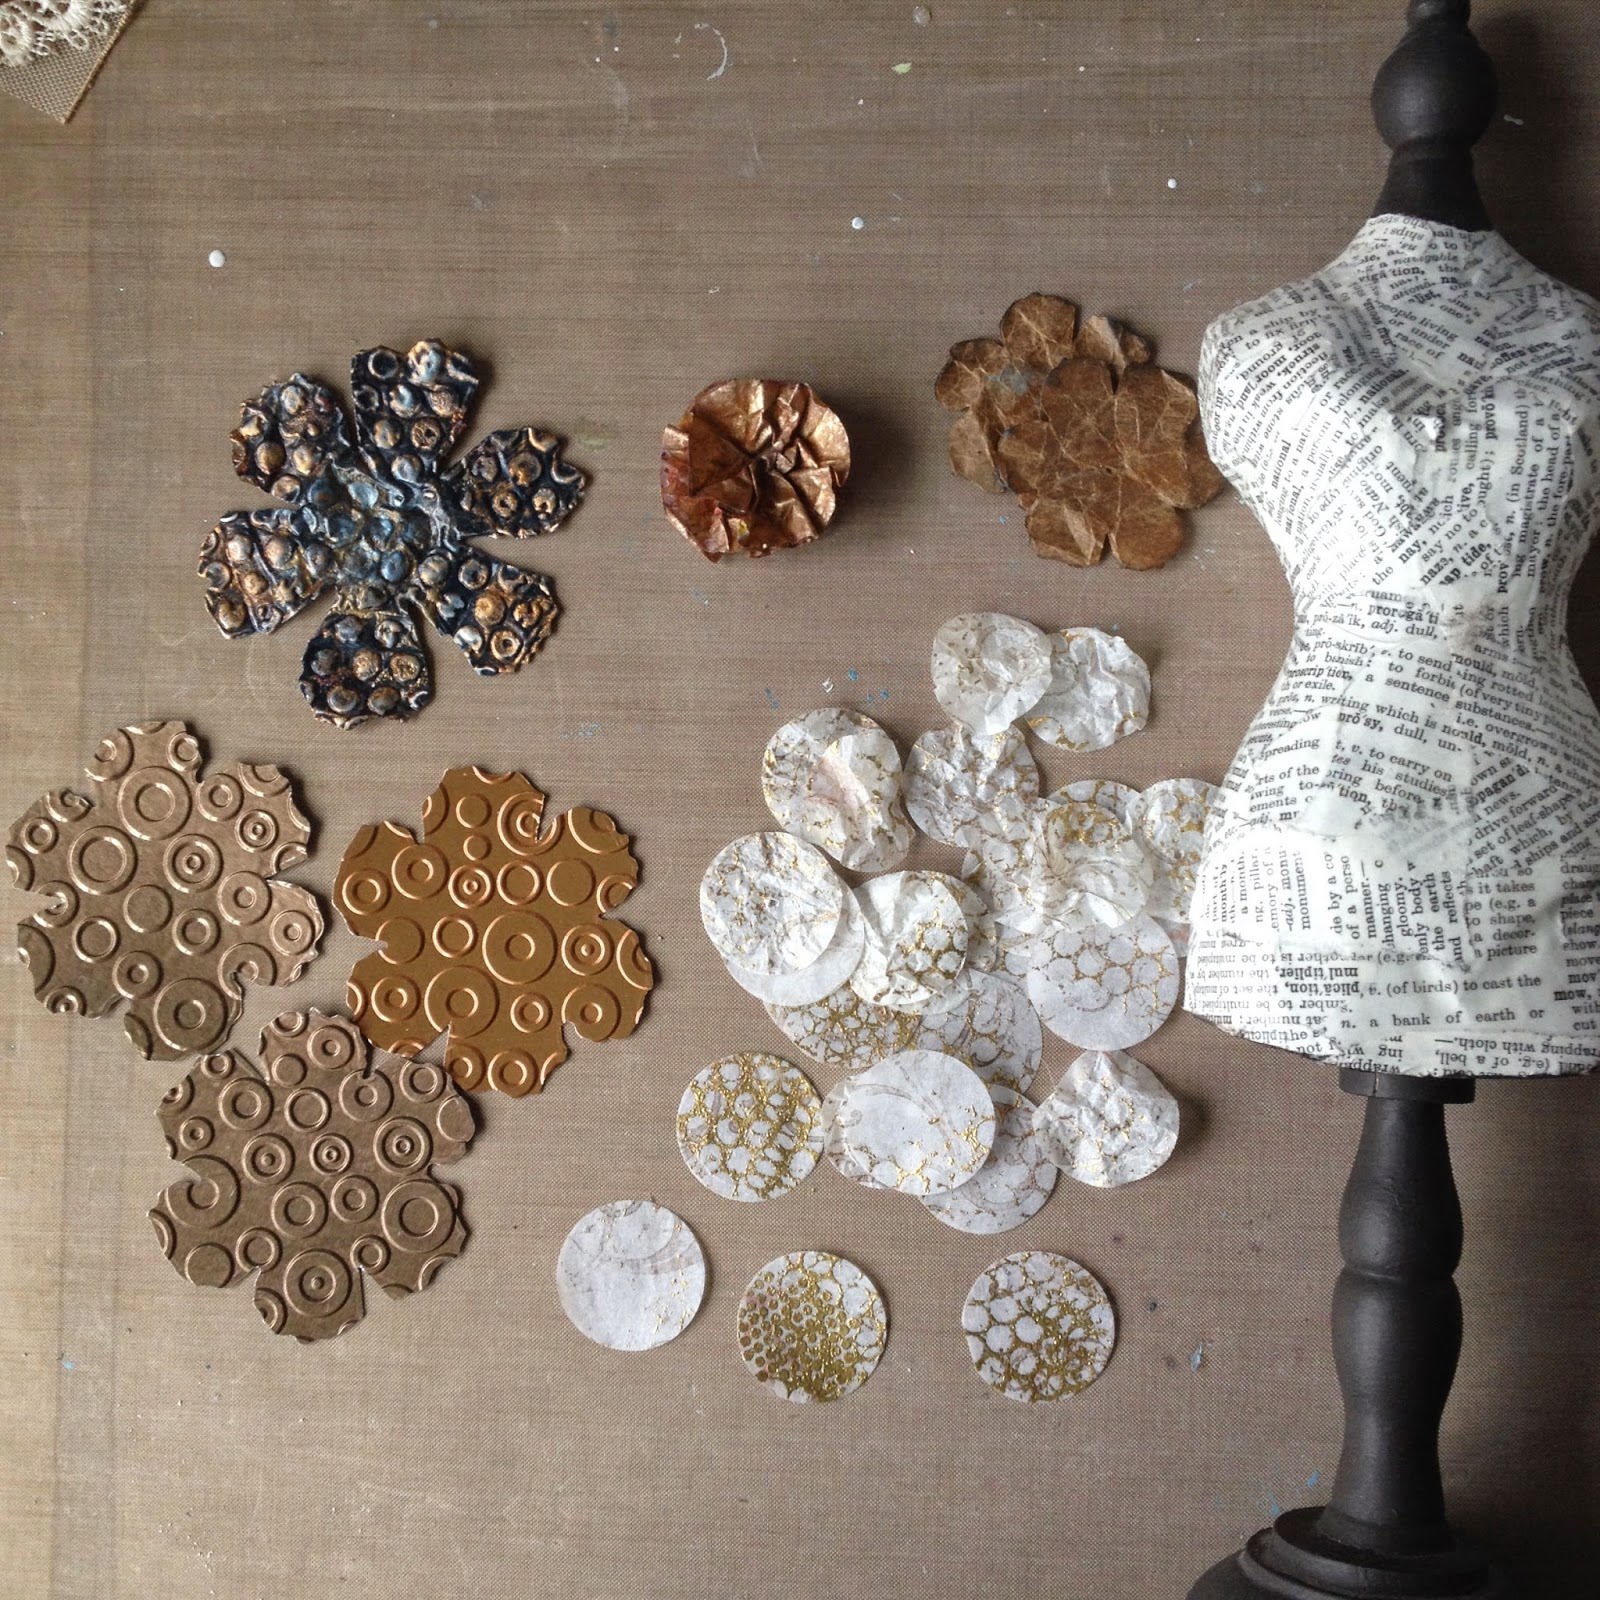
Silk Clay comes in a range of colours but I opted for white for versatility. It's a very lightweight modelling clay and I think there are similar products available. I have some homemade silicone moulds, made from buttons that I have used with plaster before.
Some were very pretty buttons but anyone who has been to one of Finnabairs classes will know that 'ugly' buttons have their place so you can make lots of lightweight ugly buttons for projects this way.


It's a lovely squidgy, marshmallowy compound with a not unpleasant smell. Pinch some off and press into the mould and remove. It takes 2-24 hrs to dry properly depending on it's thickness and size. The above dried properly within a couple of hours. The result feels like a paper cast and the beauty of it is there's an immediate result, UTEE, Mod Podge and hot glue need to set before unmoulding. I found myself making lots very quickly....it's quite addictive.


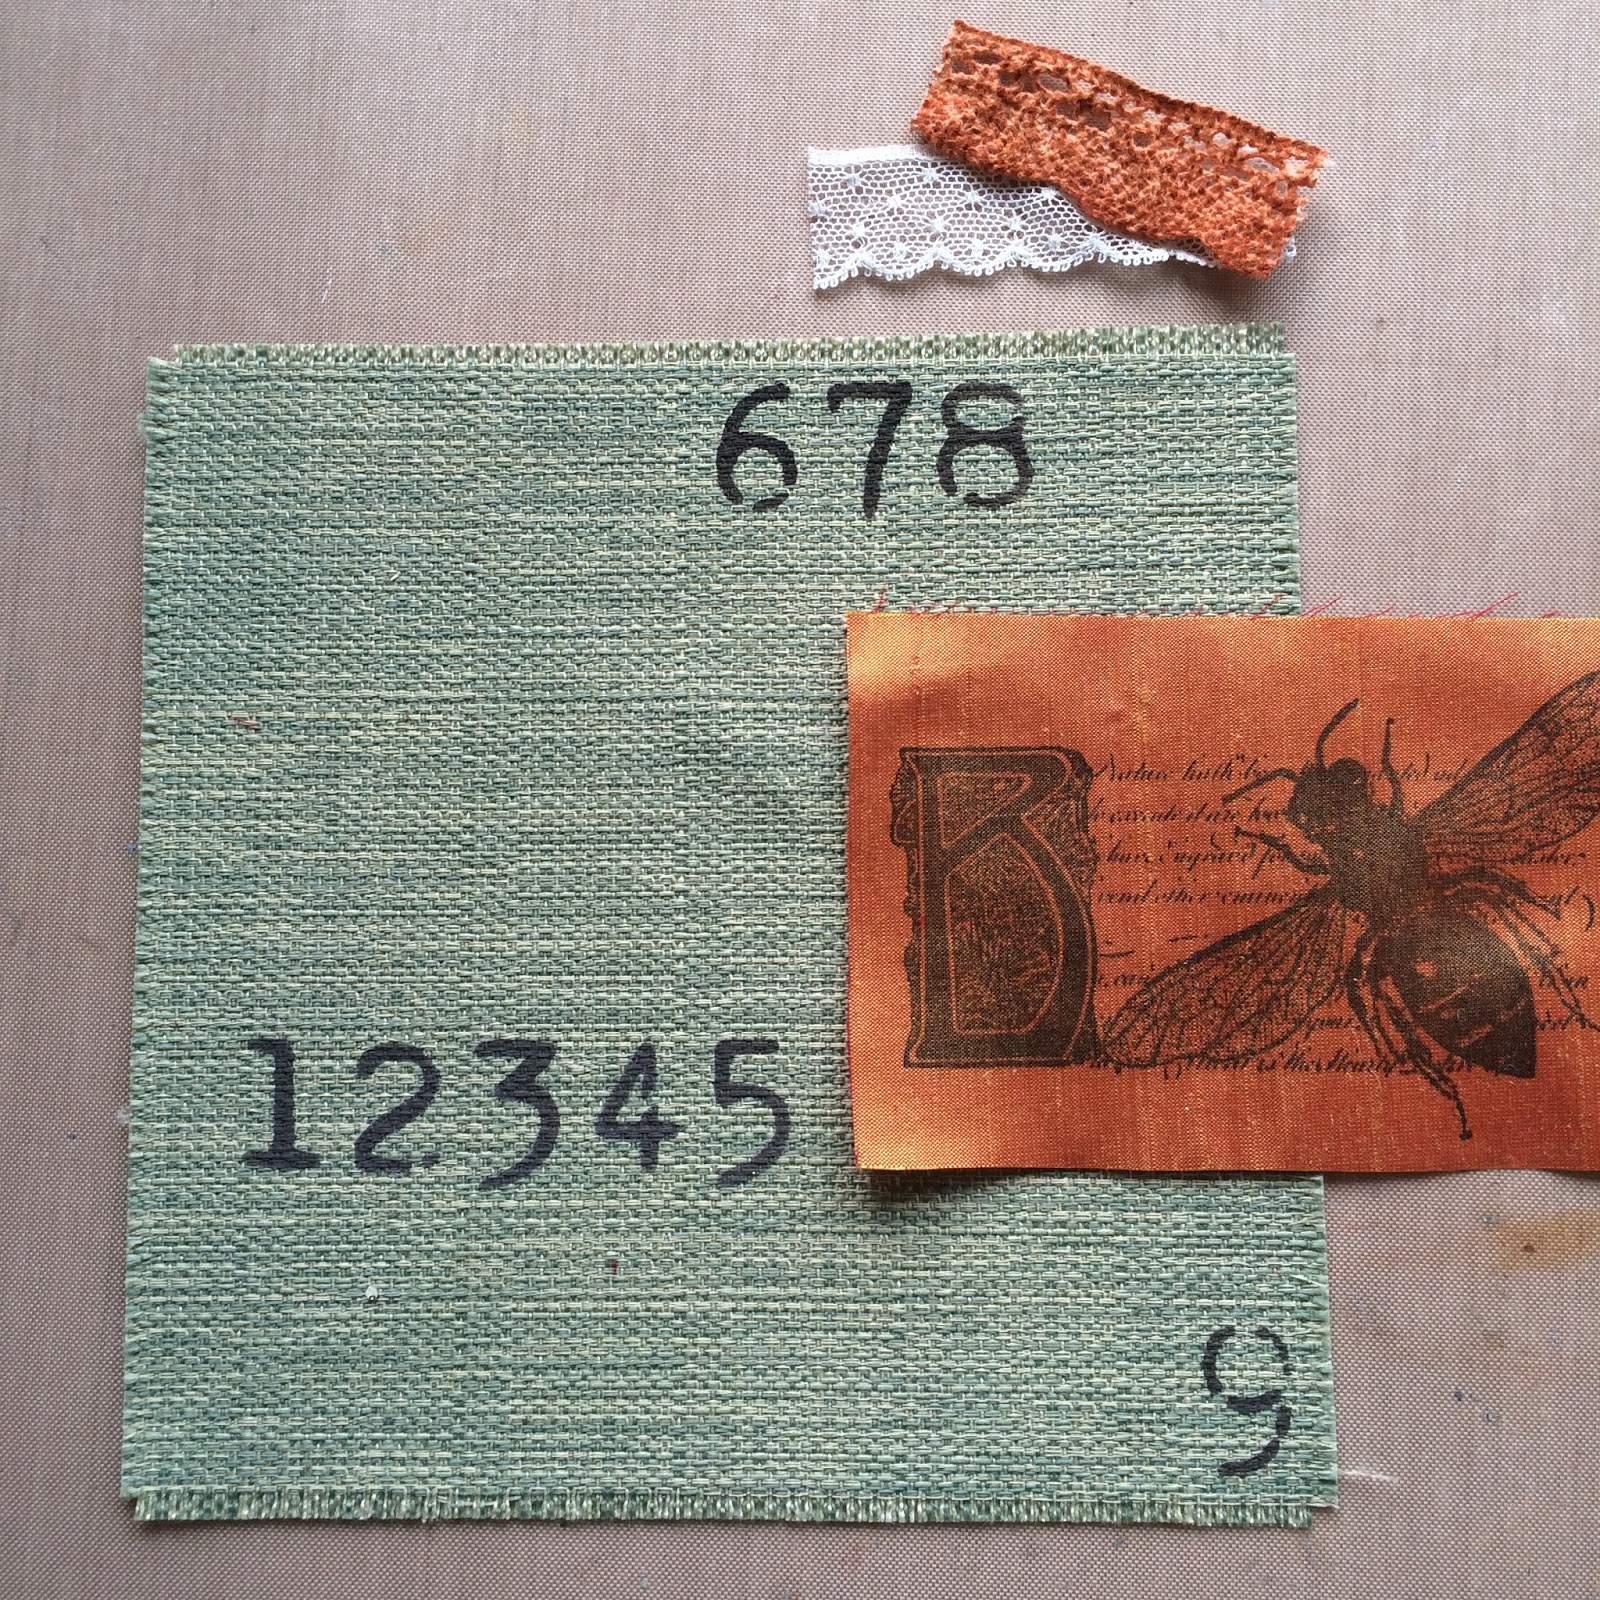
I decided I wanted to make a Birthday card for a friend who sews and used the buttons as a starting point. I applied some nylon lace strips to a piece of lutradur using a little pva glue. I had bought a mixed bag of lutradur and tyvek, both are used in creative textiles and react when heated.


The piece on the left is in it's 'raw' state, the piece on the right I had painted for my first attempt but it didn't quite work as I used some cotton lace in the mix and it didn't melt evenly. Next I carefully blasted the back and front with a heat gun trying not to set fire to the piece....joking!


The lutradur starts to form holes, the light brown horizontal strips being the glue I used. This picture of the back I think shows a rather lovely texture, which is really the aim of using the lutradur. I haven't coloured it at this stage, it's purely the effect of the heat gun. I was aiming for a very distressed effect.


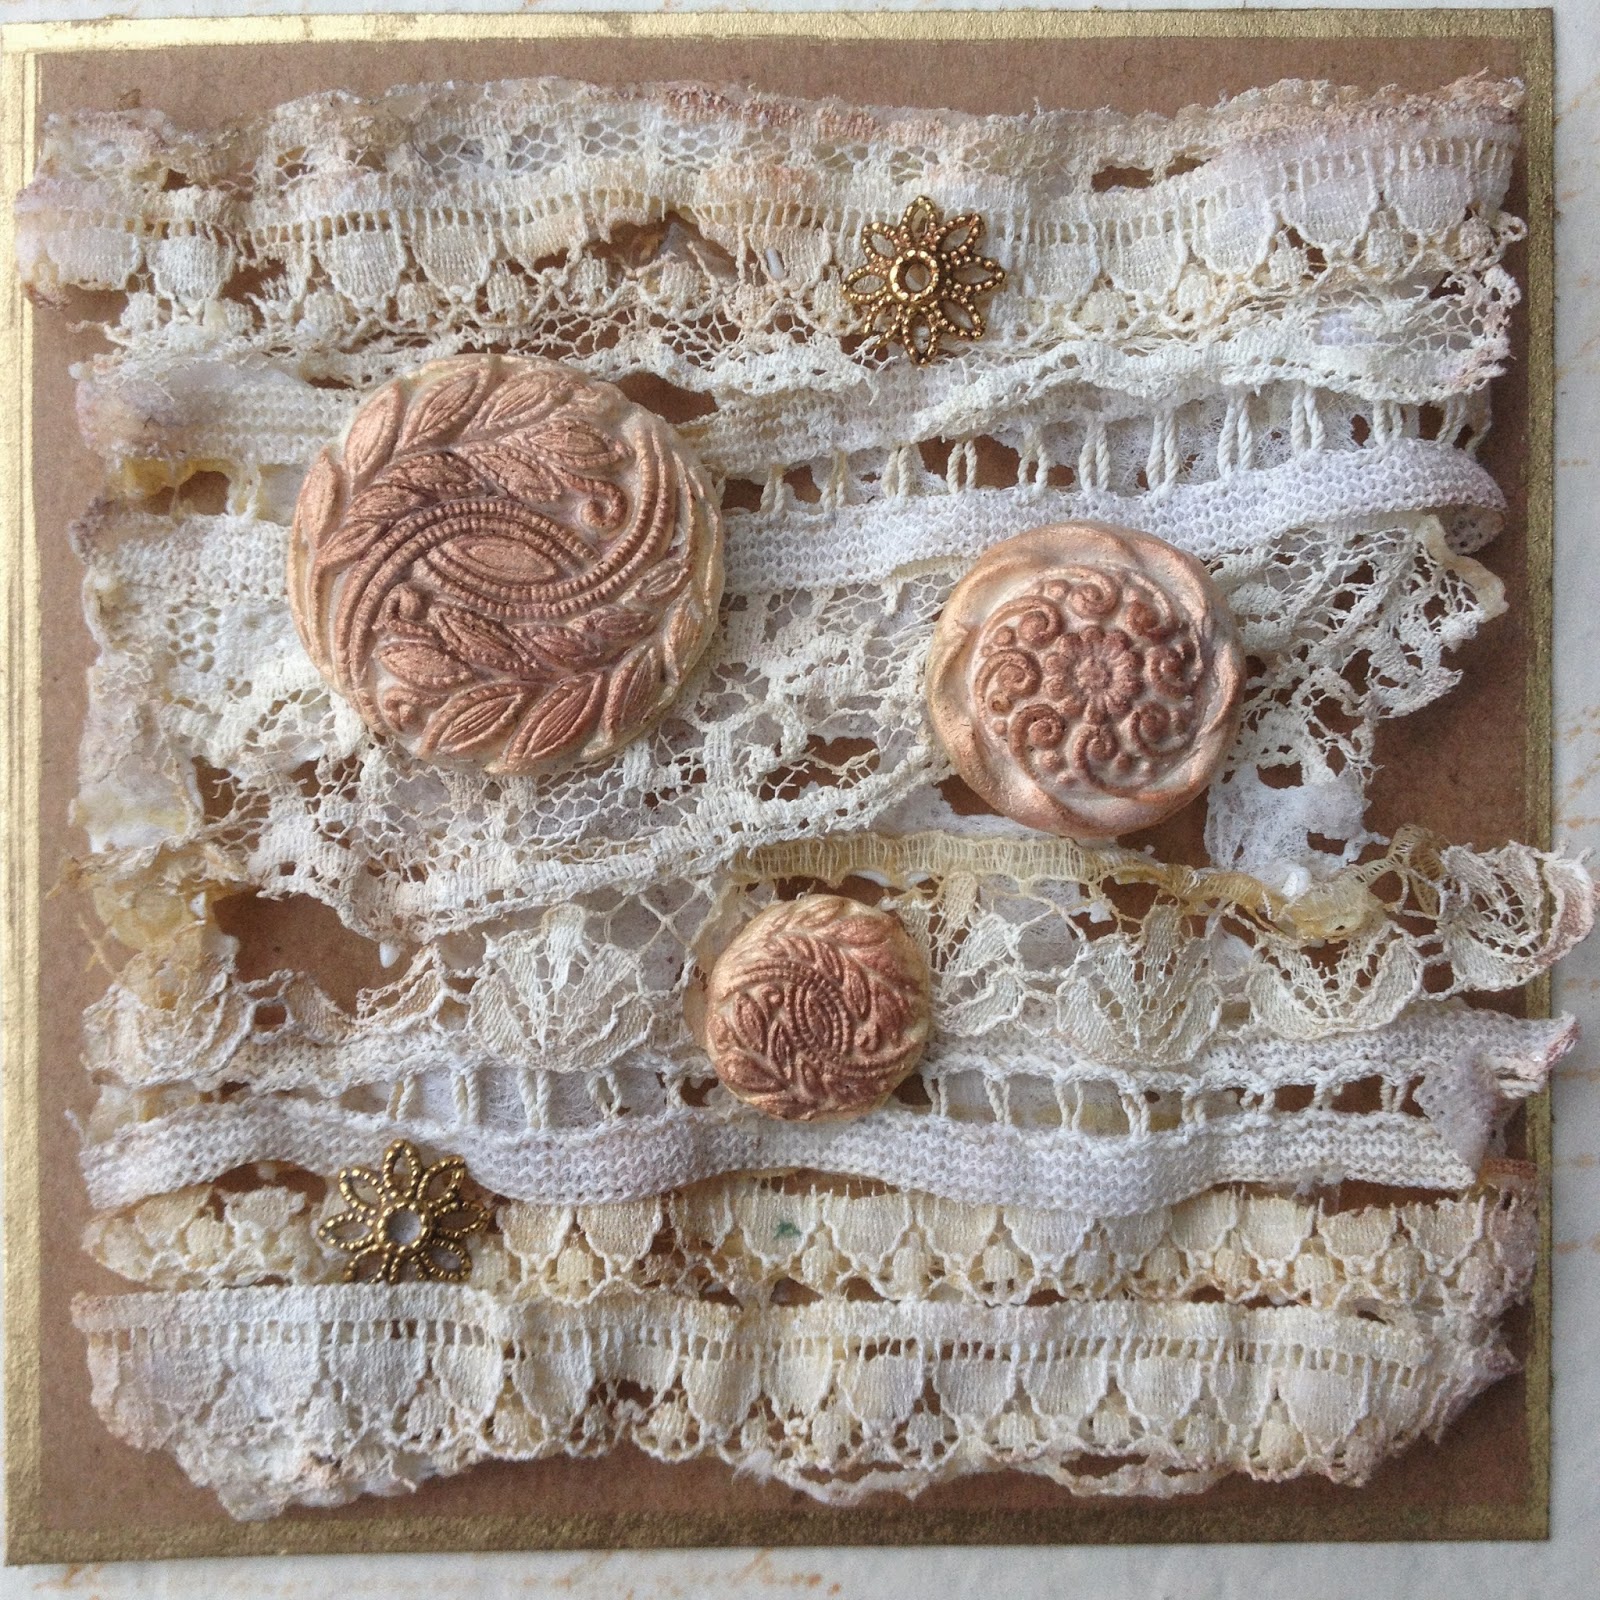
 The front- the result is a very lightweight but 'set' piece, suitable for a card. I was really pleased with the colours the lace had taken on and just emphasized this around the edges with some distress inks in antique linen and teadye.


Next I used the copper irridescent silk glaze on the buttons (love the effect) and being so lightweight they just sat perfectly on top of the lace. I also added a couple of bead findings before mounting onto kraft card.


The card base was stamped with the text stamp from the ESN11 set using teadye DI. To finish a Krylon leafing pen was then used around the edges.


A fairly simple but hopefully effective card...and very light for posting! I have a longing to make some more lace panels mounted on a canvas....but we'll see, my workdesk and mind is littered with ideas but there is never enough time to craft!

Please visit my lovely teamies blogs to see what they have been up to....hopefully they will inspire you to have a go and dust off something you haven't used yet, remember there's a £10 gift voucher from our lovely sponsors at The Artist Trading Post up for grabs! Looking forward to seeing your creations and as always thanks so much for stopping by.

Saturday, 15 November 2014

The leftover dress...

...well it's a dress made from leftovers. I started to alter this mannequin about a year ago and got as far as painting it in fresco french roast, covering it with book pages and stamping and embossing on tissue paper before cutting them into circles.....and that's as far as I got until I saw Sue Carrington's wonderful altered mannequin here. Now I know this doesn't look like Sue's but the point is it inspired me to go back to it with some ideas around the tattered florals die.


Bare with me now...I recently had a sort out in the room where I craft and one of the things I did was sort out my boxes of bits and put them out in a tray so I can see what I've got because if I can't see it in front of me I won't go looking and will just keep creating more bits. You can see a space there now!...I know, it won't stay empty for long.


Anyway this is probably one of the best things to do if you are stuck for inspiration; it feels great when you find something in that box that is perfect for your project or can be altered very easily....and that's how the leftover dress got made.


I'd originally had some idea about using circles of tissue to build up a dress but it wasn't working just in white even with the gold stamping and embossing. I had a piece of brown toned gelli print deli paper which I painted the back of in blue/ green shade before cutting into circles.


Crumple them up, we are going for a distressed look.


The bodice is metal tattered floral pieces which I embossed and then sanded to distress, I then cut the flower into petals and layered them. I still needed something for the rest of the skirt. When I saw the challenge and wonderful inspirational creations over at A Vintage Journey for All Sewn Up  I remembered I had some eclectic elements fabric and one of the pieces was a perfect colour choice.


I cut the fabric with the tattered florals die and cut the petals out fraying the edges slightly. It just needed something to lift it so I used some of the same gold embossing powder I'd already used and some vintage photo distress glitter.


Some close  up details of the layers


To finish the back I found exactly 3 circles of scrunched up and gilded pieces of glassine paper to which I added some more distress glitter and beads before securing. I also added an ideaology charm.


The paper images at the base were left over from making the tiny tins from a few months back secured along with the metal embellishments.


Recently I've not been able to enter any challenges or post as regularly as I'd have liked to so I've really enjoyed just creating this for no particular reason....and it's a bonus to be able to enter it in a challenge.
I'm entering it in The Sunday stamper challenge which is 'Sewing and Stitches' and I'm also entering it in A Vintage Journey 'All Sewn Up' (link in above post).
The stamped images and dies are Tims and I've gone for a distressed shabby feel to this sewing themed entry, hope it fits the travelling instructions.
 I've really enjoyed making it and that's the most important thing. Hope you enjoyed your visit, I really appreciate all your wonderful comments and hope to visit your blogs a bit more often. Thanks so much for dropping by.