Showing posts with label wax. Show all posts

Thursday, 1 March 2018

Wax Lyrical at Stamps and Stencils

Hi everyone, it's time for our next challenge at Stamps and Stencils and Sue is our lovely host....and we are playing with wax this month! Here in her own words is what she wants us to do.

' I have long been fascinated with the subject of Encaustic Artmelting wax to create many layers and trapping pieces of fibres and papers between the layers of melted wax just seems magical to me. So for this challenge I want to see some wax on your projects, whether it's just dribbled, melted and then stamped into or a wax embellishment as long as you include some stamping or stencilling the choice is yours !'


My first inspiration post at Stamps and Stencils was about wax and had some basic information you can refer to link here. This time I thought I'd try and explore wax on paper and the wonderful 'transparentizing' effect it can have. I thought this could be a good starting point without expensive supplies to tempt and inspire you to just dabble with your melt pot, a little beeswax and paper.

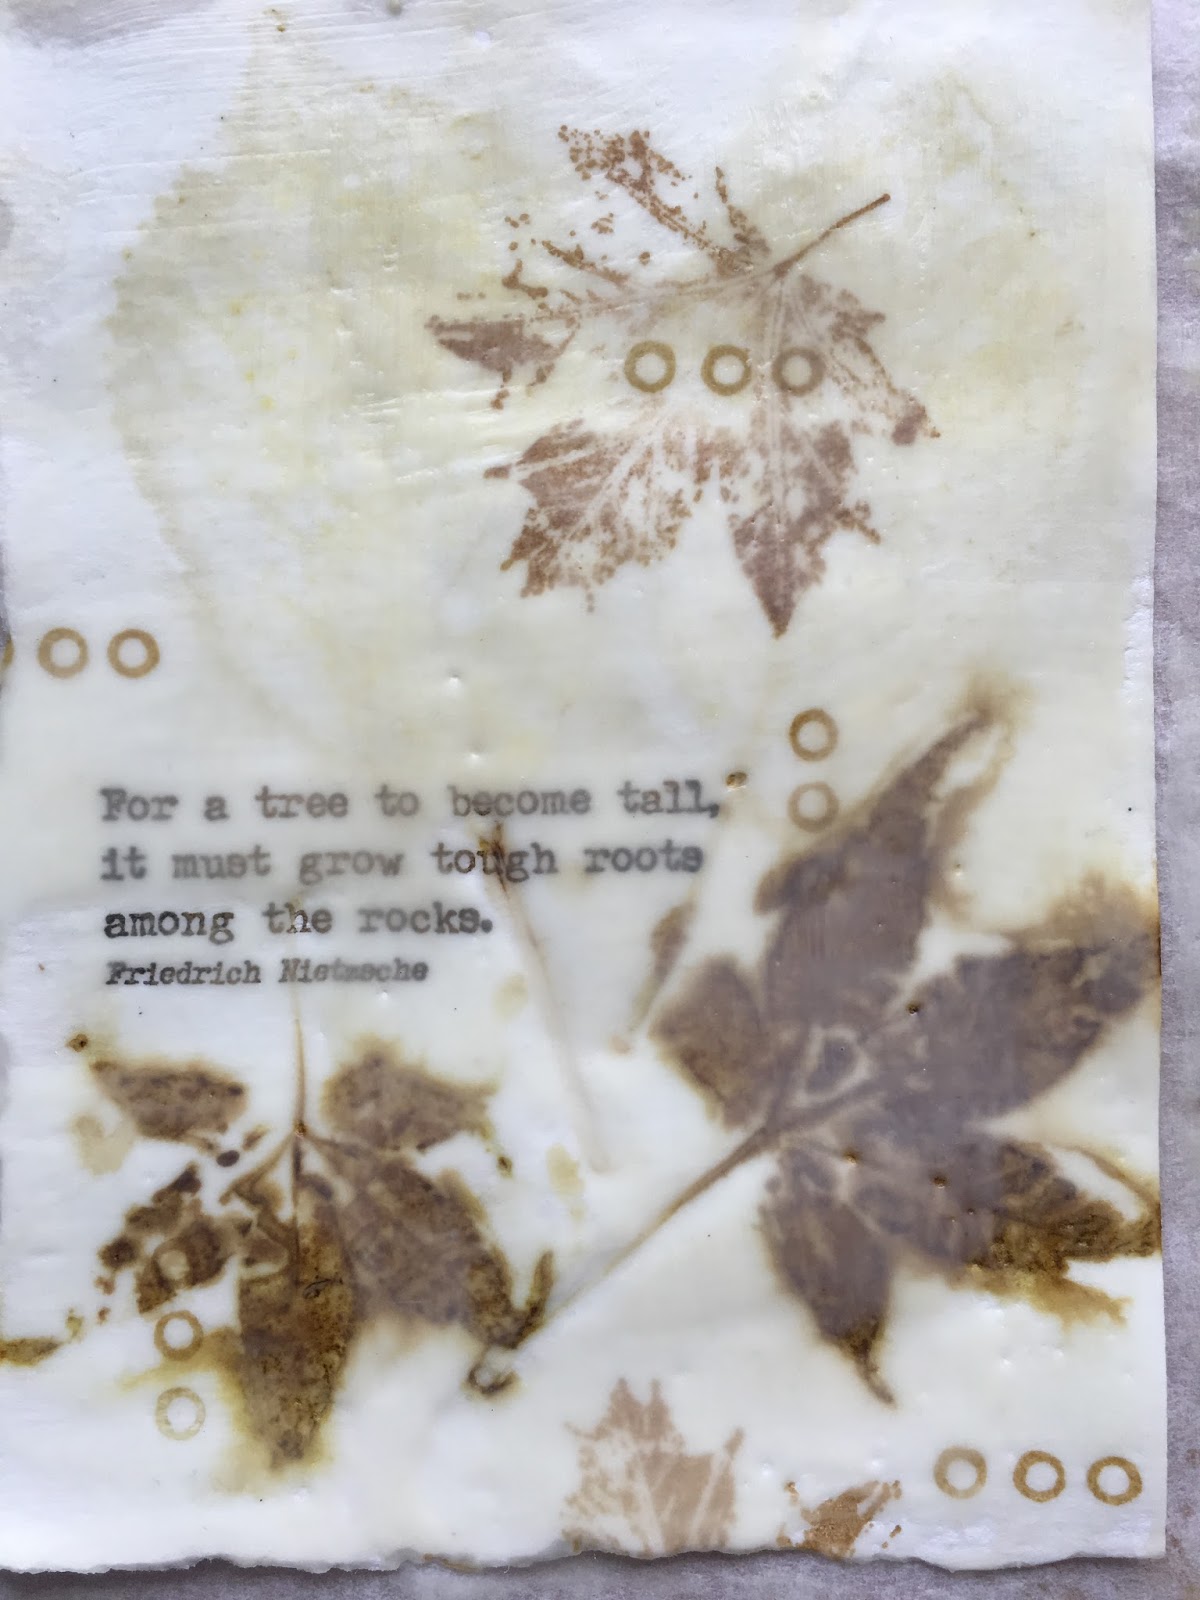
I made some eco leaf prints with autumn leaves last year which I hope to blog about it at some stage. I chose one of the pieces that I  thought could be enhanced with some stamping before coating with encaustic medium. Firstly I've added a lovely quote from one of  Alison Bomber's word plates.


Now some stamping to compliment what is already there.


When you first put the wax on it will sit on top. Fusing and another coat later it will start to sink into the paper. Normally you should have a solid heat resistant base such as wood or encaustic board; if I had made it on canvas it would sit on top and crack but handmade paper or good quality watercolour paper will absorb some of the wax and won't crack....unless you choose to crumple it up or fold it of course!


I've added a few drops of white encaustic medium. 


I also used a stencil and some gold leaf rubbed through it. If adding leaf metal or mica it must always be on the top layer if you want to keep the shine.


One of the things I love about encaustic are the depth of layers created and how the wax softens everything.


I'm hoping you can see the lovely sheen you get with encaustic when 'polished', I used a nylon pop sock to buff it.


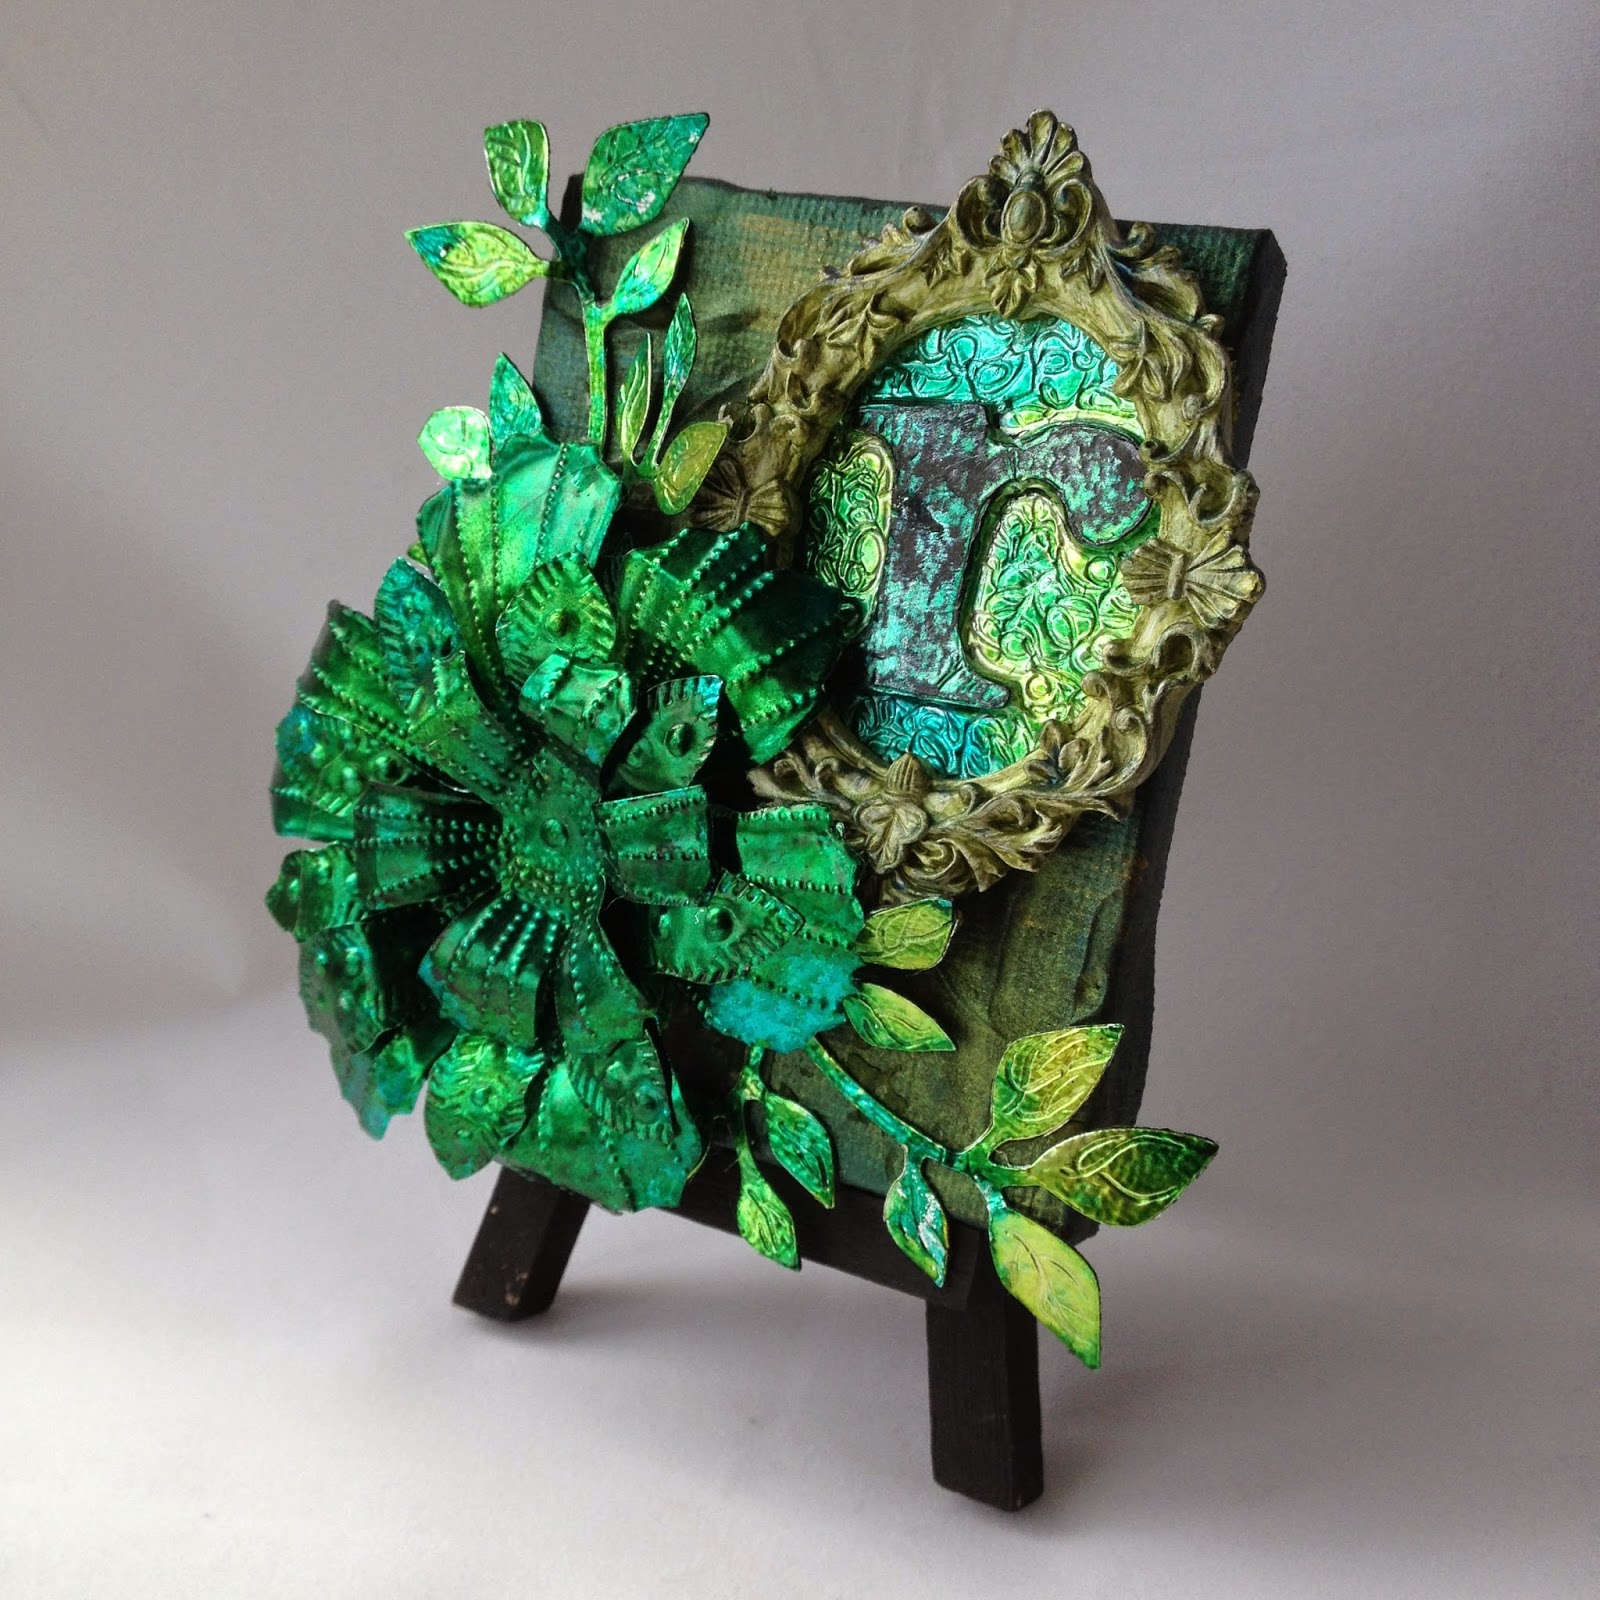
The frame is painted with chalk fresco and a touch of treasure gold and moss green ink. I used a double sided tape sheet to stick the paper to the wooden frame back and chose not to use the glass that came with it.


There are lots of lovely and inspiring ideas from our DT of how to incorporate wax into your projects over on the blog. Hop across and checkout their posts and can't wait to see what you create!

Ruth x

Sunday, 30 October 2016

Catch up...

Hi everyone, thought I'd squeeze in a post before the end of the month and share a few things that I've made recently. Some items I've already shared peeks of via social media but I'm starting with some encaustic panels I made months ago but realise I hadn't posted yet. I am now wanting to play with wax again...

Pan pastels and wax, I'm so pleased with how this turned out, some dry brushing of coloured wax is then given a top layer of pan pastel through a stencil.


PVA glue through a stencil and burnt, there is a bit of a story to this one revolving around my cooks blow torch being temperamental and it didn't go quite to plan so I decided to finish off with a shellac burn (for explanation of this technique please see links in side bar to previous wax posts)


Stencilling and scoring into wax before dry brushing.


Next I recently attended a Lin Brown workshop which involved lots of painty fabric play and stitching....as always it was brilliant.


 some detail photos


Lastly I attended a France Papillon workshop last year and one of the creations I made was a 'Grimoire' or an ancient book of spells. It's made of handmade papers, book text and maps and I've not wanted to write in it or use it because I've struggled to find something which I think is suitable for it....until now


A scrap piece of book paper which I'd been using to wipe my paint brush seemed perfect for a little snowflake paint as a base to then stamp on.


Lin Brown's new stamps in sepia, some stitching and fragments of heat embossed skeleton leaves  just fitted in perfectly to me.


Thanks for stopping by x

Friday, 26 February 2016

Wax part 3..

Hi everyone, I'm sharing the last of my encaustic endeavours with you tonight. It's a photo heavy post with 4 unfinished or technique pieces. First up is a piece incorporating  stamping, stencilling and shellac....again!


Acrylic paints and wax don't really mix as the acrylic causes the wax to lift, but if used on the base it has a chance to absorb into the encaustic board and in small amounts can be used. It's very difficult to see but I used Bubblegum Pink fresco and an Ellen Vargo stamp across a section at the top and stamped a Lin Brown stamp 'Timeless Moments' in archival...which you can just about make out.


I then used a layer of clear encaustic medium and once set, used an Emma Godfrey stencil PS015 to paint blue encaustic medium through, across the base and the top section. Once cool I dry brushed other wax colours on and at this stage so wished I'd taken a photo as I was loving the effect...but I didn't.


I just couldn't resist trying the wet shellac burn again, I thought just a thin line dripped in the 3 white spaces would finish it off, but of course the flames just started to melt the design, however it was a happy accident as I really do like the result. Like all experiments you never quite know what will happen.

For the next piece I tried some more dry brushing this time layering a few different colours of paints, this creates a lot of depth.


You must wait for the paint to cool in between to achieve definition which at first doesn't take long as the board is cool but as the layers build it takes longer to cool. Not being the most patient person when I'm experimenting the top layers started to lose that definition, however if you zoom in the edges are much more textured.


Just using a few colours can acheive quite a variation. The tiny white specks are from a pearlescent wax paint.


The first 2 pieces were on 6 x 6 plywood panels, this next piece is a 4 x 4 piece of wood which had a base coat of white encaustic medium which I made by mixing a small piece of white oil stick paint into clear medium. I'd seen a video by Nancy Crawford where she transfers flocked paper onto wax and so was inspired to incorporate this.  


Another lesson learned as I didn't press hard enough so the image is very pale. I then thought I'd have a play adding some black and red in lines across the base along with clear medium and yet again should have stopped, walked away, thought about it and come back...but I added some more in the corner and then over fused and the red started to run....wasn't happy with this so had a think.


Well I hadn't tried any scraping back...so I did. White oil paint rubbed in to the creases, some india ink drips and lastly dry brushing with white wax. This was all done in stages and I realised it's s good idea to have  few pieces on the go  at once so you can give the wax chance to set and stop yourself from messing when you shouldn't! Definitely for reference and not a finished piece.  

Last but not least is a piece that went through many changes, many layers....and this is it's journey.


I hadn't used paper as  base so using some Chatsworth paper, I glued it down and left it to dry overnight. At this stage it has stamping on the paper, a layer of clear encaustic medium and some cutting in using a stencil as a guide, then some portfolio pastels rubbed into the circles before fusing.


Another layer of wax, cutting in, burnt umber rubbed in to dips and some more paper applied. Not sure at this stage.


Another layer and definitely don't like it, losing all the layers.....need a change of direction...melt some of the wax off.


Pan pastels, the stamping is showing through more but I'm still not happy.....another change....think the shellac is calling.

I'd seen mica powder used with wet shellac burn so another technique to try.


Think this is my new favourite, I even threw on some beads that were on my desk just as it was setting.


So vibrant


The stamping is still visible and love the touches of white portfolio pastel. 


Well done if you got to the end, I will definitely be exploring encaustic more in the future and hope you've enjoyed seeing the results so far. Hope you have a lovely crafty weekend and thanks for taking the time to visit and leave comments, I appreciate them very much. Ruth x

Monday, 22 February 2016

The wonderful world of wax!

Hi, thanks for all your lovely comments on my last post, as promised I'm back to share a few more results from my encaustic explorations. Whilst I don't expect to inspire you to have a go, I thought you might be interested in the results. The first two are 10cm square pieces of stampboard.


This time it's using shellac and a technique called a wet shellac burn. Firstly alcohol inks are used across the top strip, once dry apply shellac and 'burn'. Yes flames are involved and outside is the best place to do this part but for more information please refer to the book I mentioned in my previous post.  I then decided to add more wax with dry brushing.


A different colour way in blues.

The last one for tonight is a dry shellac burn, I used pan pastels to colour the clear shellac and the applied over white encaustic medium.


 Once dry you burn areas, usually in circles but I thought I'd do snail trails. The pinky edges are from coloured wax that was under the white.


Rather like the effect.

As I said in my previous post there is just so much you can do with wax and these are just ideas that I might use in areas on a piece or as a whole.  I hope you're enjoying the slightly different posts at the moment and I'll share my last few waxy experiments later this week.

Thanks for stopping by and enjoy your crafting!

Saturday, 20 February 2016

Glue & Wax

Hi everyone, following on from my last post I've been exploring all things encaustic. There are so many techniques you can use with wax and I've been trying things out guided by the resource which is You Tube and my 'bible' ...The Whole Ball of Wax by Patricia Baldwin Seggebruch. I'm sharing a finished piece with you tonight and also entering it in the current PaperArtsy challenge which of course is Wax!


As there are many resources available and explanations along with safety information would take a long time, I'm just giving brief information on the technique.

It's a 10cm square piece of wood and I've used one of Lin Brown's new stencils to create this. I used white glue through the stencil before some burning took place with a recently purchased inexpensive cooks blow torch! There's one coat of encaustic medium on the piece and the colouring has been done using pan pastels before fusing. A final tickle of treasure gold completes the piece.


 I've created several technique pieces which  might also be called works in progress and thought I'd share them with you over the next week.

Thanks as always for stopping by and enjoy your weekend.

Tuesday, 14 July 2015

Featured on Tuesday's Tutorials!

Yes I'm absolutely thrilled that my April  'Hot Wax' post over at Stamps and Stencils is being featured on Marjie Kemper's blog today as part of her fabulous Tuesday Tutorials series.

 preview

Over the last year Marjie has run a Texture on Tuesday series, which has been wonderful. From June this year her focus is on tutorials and there have been some pretty amazing and inspirational posts already.....so I feel so honoured to have been asked by Marjie if I wanted my Hot Wax inspiration post to be featured.....of course I said YES!


Hope you'll hop across and check the post out if you missed it first time around. Once again thank so much Marjie for featuring my post. 

Thanks for stopping by and Happy Crafting!

Thursday, 23 April 2015

Hot Wax!...at Stamps and Stencils.

Hi everyone, it's time for my first inspiration post over at Stamps and Stencils. I've been exploring  beeswax so hope you'll hop across and see what I've been up to.


Sorry I've been absent for a while, hope to catch up and visit you all soon! 

Monday, 30 March 2015

Catch up part 2....

Quick edit...following on from my brief post yesterday about our new challenge blog Stamps and Stencils, it's my turn today along with my lovely teamie Yvonne to be introduced. As the name suggests it's all about using stamps and stencils in your mixed media projects...I'm so proud to be working with these talented ladies again...our first challenge starts on Thursday!

 Hi, part 2....I attended a Sue Carrington workshop a few weeks ago where we created a wonderful canvas panel with lots of lovely techniques but what I especially liked was that we were using beeswax. I haven't used it as often as I'd like to and have to admit I have a desire (even more so now) to dabble in encaustic artwork, layering wax on panels  to create muted shapes of depth a la Donna Downey and France Papillon. Anyway before I get carried away...here's what we created.


I won't give too much away but there is some stamping on tissue and when combined with wax gives a soft quite beautiful finish.


Some lovely paint techniques to age things


And there is some drippage here and there!


I'm lucky that Sue has become a good friend since I've attended some of her workshops and felt really honoured when she made a lovely present that I thought I'd share with you. You may think it looks familiar, she made a similar one here for another crafty friend.  


It has pride of place on my pen draw where I can see it when I 'create'. Thankfully Sue has taken my big hint and her next workshop is a metal work one.....


...can't wait. If you're around the West Hallam area of Derby June 20th you might be interested, you can find all the details on her blog here

Whilst on a green theme, I've signed up for Donna Downey's Inspiration Wednesday workshop and thoroughly enjoying experimenting and just enjoying her videos she has such an enthusiasm for art and never fails to make me laugh. I've made my art journals, although I love fabric, me and sewing machines aren't a match made in heaven, so I'm quite pleased with how they turned out.


I said a green theme, well there's a you tube video here of a past Inspiration Weds post from 2013 that I wanted to have a go out. This is my version, it's paint and gesso, UTEE and paper flowers. It's a textural piece...or in my words, touchy, feely.


This is part way through.


If I was doing it again, I wouldn't add as much colour to certain areas, but then that's what experimenting is about.


It really is a glossy dimensional piece. Hope you enjoyed this catch up, exciting times ahead this week. Thanks so much for stopping by.