Hi, it's Exchange Day over at 'The Artist Trading Post' and my turn to share what I've been up to. I've been experimenting with acrylic pigment ink so please hop over here for all the details. Here's a sneaky peek!
Thursday, 15 January 2015
Sunday, 11 January 2015
Tim's Tag
Just thought I'd share my entry for Tim's January tag. All the instructions for the original can be found here . I was restricted by my colours of distress glitter, paints and stains and what would work well together. It was either vintage photo or pumice stone. I know I love brown but I wanted to do something different....
....the end result is a very grungy almost industrial look....very different to how it began, and very different for me.
I decided that pumice stone had a slightly pink tinge so put that with milled lavender paint and brushed pewter stain. The placement and use of different alpha parts was straight forward however I just couldn't get the colours to work for me.
It started out as a very much lighter project but the light coloured paint and glitter just didn't pop as they do on Tim's tag. It underwent several changes and I used some dusty concord and pine needles DI as well. I had several mishaps including overdoing the picket fence and silver splattering, which is when I walked away from it.....temporarily.
This morning I went back to it with fresh eyes and decided that to make it pop the background had to go much darker. I used a water soluble pencil around the edges of the words and although you can't really see the lilac and green tones it is what it is and at a stage I'm happy with.
I did think about the words I put on and had included 'don't give up have courage to be different', not realising how appropriate they would be! First tag of the year completed.
....the end result is a very grungy almost industrial look....very different to how it began, and very different for me.
It started out as a very much lighter project but the light coloured paint and glitter just didn't pop as they do on Tim's tag. It underwent several changes and I used some dusty concord and pine needles DI as well. I had several mishaps including overdoing the picket fence and silver splattering, which is when I walked away from it.....temporarily.
This morning I went back to it with fresh eyes and decided that to make it pop the background had to go much darker. I used a water soluble pencil around the edges of the words and although you can't really see the lilac and green tones it is what it is and at a stage I'm happy with.
I did think about the words I put on and had included 'don't give up have courage to be different', not realising how appropriate they would be! First tag of the year completed.
As always thanks for stopping by, it means a lot that you take the time to leave comments and I always enjoy reading them.
Thursday, 8 January 2015
'Fresh Beginnings'
May I wish you all a Happy and Healthy New Year and welcome you to the first 2015 challenge over at ATP Exchange! Sue is our host and has chosen 'Fresh Beginnings' for this challenge...... Now that the festive season is over and thoughts turn to what lies ahead in the New Year, take a look through your craft supplies and share with us a new product/technique/ or even a new item to alter !
I bought a tub of Silk Clay just before Christmas from the Artist Trading Post and thought this challenge was the perfect opportunity to experiment with something new (who me...experiment?). I also used my new iridescent silk glazes (yummy) and some lutradur (or it maybe Tyvek?) that I purchased a while ago.
Silk Clay comes in a range of colours but I opted for white for versatility. It's a very lightweight modelling clay and I think there are similar products available. I have some homemade silicone moulds, made from buttons that I have used with plaster before.
Some were very pretty buttons but anyone who has been to one of Finnabairs classes will know that 'ugly' buttons have their place so you can make lots of lightweight ugly buttons for projects this way.
It's a lovely squidgy, marshmallowy compound with a not unpleasant smell. Pinch some off and press into the mould and remove. It takes 2-24 hrs to dry properly depending on it's thickness and size. The above dried properly within a couple of hours. The result feels like a paper cast and the beauty of it is there's an immediate result, UTEE, Mod Podge and hot glue need to set before unmoulding. I found myself making lots very quickly....it's quite addictive.
I decided I wanted to make a Birthday card for a friend who sews and used the buttons as a starting point. I applied some nylon lace strips to a piece of lutradur using a little pva glue. I had bought a mixed bag of lutradur and tyvek, both are used in creative textiles and react when heated.
The piece on the left is in it's 'raw' state, the piece on the right I had painted for my first attempt but it didn't quite work as I used some cotton lace in the mix and it didn't melt evenly. Next I carefully blasted the back and front with a heat gun trying not to set fire to the piece....joking!
The lutradur starts to form holes, the light brown horizontal strips being the glue I used. This picture of the back I think shows a rather lovely texture, which is really the aim of using the lutradur. I haven't coloured it at this stage, it's purely the effect of the heat gun. I was aiming for a very distressed effect.
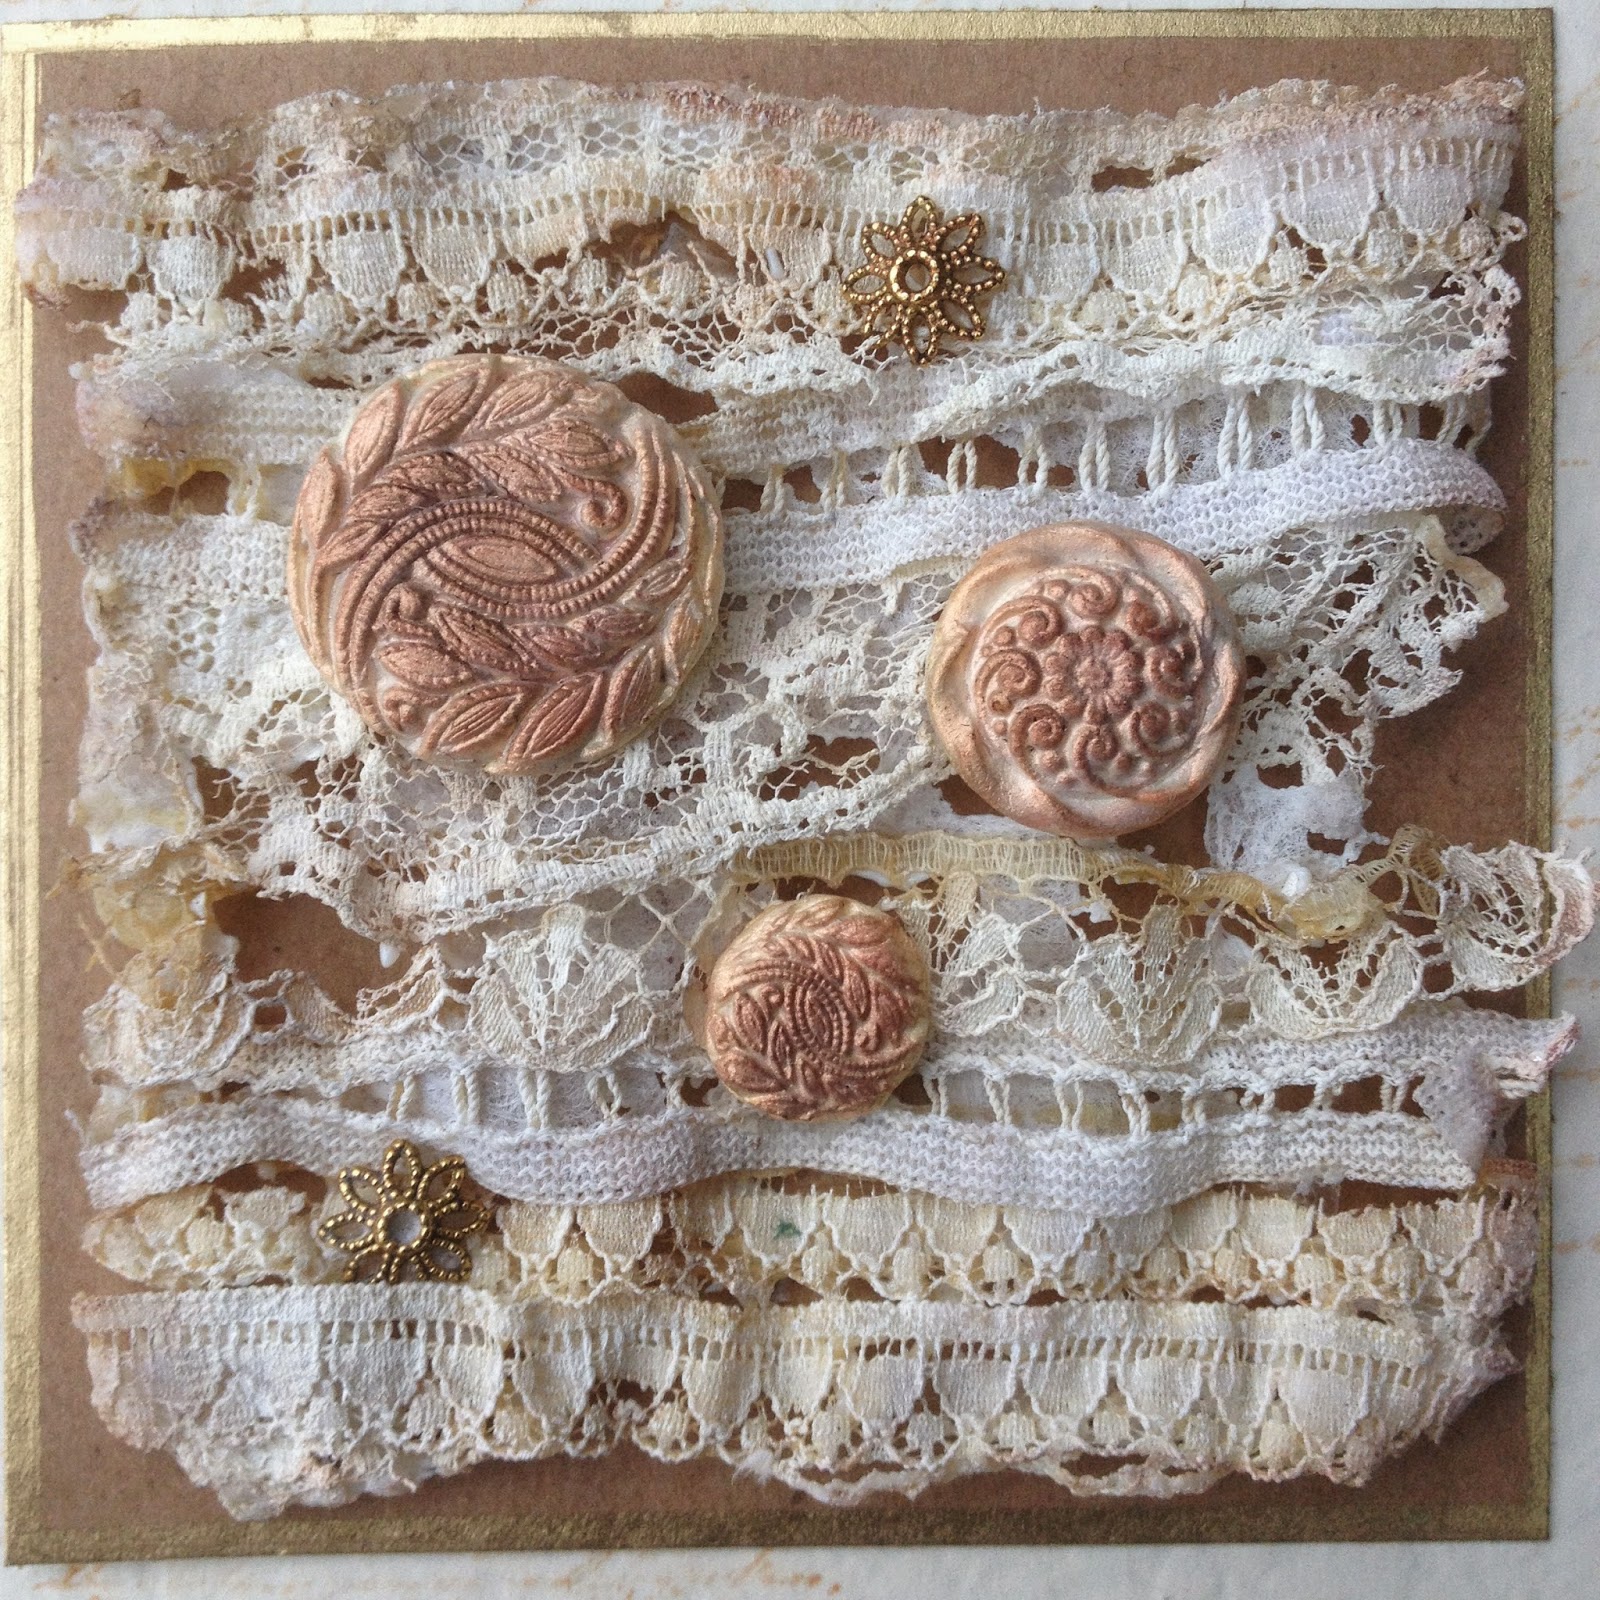
The front- the result is a very lightweight but 'set' piece, suitable for a card. I was really pleased with the colours the lace had taken on and just emphasized this around the edges with some distress inks in antique linen and teadye.
Next I used the copper irridescent silk glaze on the buttons (love the effect) and being so lightweight they just sat perfectly on top of the lace. I also added a couple of bead findings before mounting onto kraft card.
The card base was stamped with the text stamp from the ESN11 set using teadye DI. To finish a Krylon leafing pen was then used around the edges.
A fairly simple but hopefully effective card...and very light for posting! I have a longing to make some more lace panels mounted on a canvas....but we'll see, my workdesk and mind is littered with ideas but there is never enough time to craft!
Please visit my lovely teamies blogs to see what they have been up to....hopefully they will inspire you to have a go and dust off something you haven't used yet, remember there's a £10 gift voucher from our lovely sponsors at The Artist Trading Post up for grabs! Looking forward to seeing your creations and as always thanks so much for stopping by.
I bought a tub of Silk Clay just before Christmas from the Artist Trading Post and thought this challenge was the perfect opportunity to experiment with something new (who me...experiment?). I also used my new iridescent silk glazes (yummy) and some lutradur (or it maybe Tyvek?) that I purchased a while ago.
Silk Clay comes in a range of colours but I opted for white for versatility. It's a very lightweight modelling clay and I think there are similar products available. I have some homemade silicone moulds, made from buttons that I have used with plaster before.
Some were very pretty buttons but anyone who has been to one of Finnabairs classes will know that 'ugly' buttons have their place so you can make lots of lightweight ugly buttons for projects this way.
It's a lovely squidgy, marshmallowy compound with a not unpleasant smell. Pinch some off and press into the mould and remove. It takes 2-24 hrs to dry properly depending on it's thickness and size. The above dried properly within a couple of hours. The result feels like a paper cast and the beauty of it is there's an immediate result, UTEE, Mod Podge and hot glue need to set before unmoulding. I found myself making lots very quickly....it's quite addictive.
I decided I wanted to make a Birthday card for a friend who sews and used the buttons as a starting point. I applied some nylon lace strips to a piece of lutradur using a little pva glue. I had bought a mixed bag of lutradur and tyvek, both are used in creative textiles and react when heated.
The piece on the left is in it's 'raw' state, the piece on the right I had painted for my first attempt but it didn't quite work as I used some cotton lace in the mix and it didn't melt evenly. Next I carefully blasted the back and front with a heat gun trying not to set fire to the piece....joking!
Next I used the copper irridescent silk glaze on the buttons (love the effect) and being so lightweight they just sat perfectly on top of the lace. I also added a couple of bead findings before mounting onto kraft card.
A fairly simple but hopefully effective card...and very light for posting! I have a longing to make some more lace panels mounted on a canvas....but we'll see, my workdesk and mind is littered with ideas but there is never enough time to craft!
Please visit my lovely teamies blogs to see what they have been up to....hopefully they will inspire you to have a go and dust off something you haven't used yet, remember there's a £10 gift voucher from our lovely sponsors at The Artist Trading Post up for grabs! Looking forward to seeing your creations and as always thanks so much for stopping by.
Subscribe to:
Posts (Atom)