Hi, hope you're all enjoying a crafty weekend. Following on from the
previous post I'm back to share the rest of my junk journal pages and a few more details. Warning! Photo heavy and you may need refreshments for the journey.
 |
| Inside the back cover |
Thought I'd start off with sharing the tags from the journal. Whilst I did use manilla and kraft tags as well, below were all either die cut, altered tags or pieces of card cut to fit the pocket but with the addition of a file tab and some chit chat stickers.
The aqua tags below are cut from a piece of watercolour card stock which I'd used to press flowers (think it was a technique in Craft Stamper yonks ago...can't even remember how I did it now) I do remember using some distress ink to add some colour and that was as far as I got.
Partly painted kraft card and crunchy wax paper strips, Graphic 45 papers, embossed paper and the feather card turned into a tag with a little tab.
The tabs on the side and if you look at the very bottom tab, it's made from the off cuts from using an envelope thumb notch punch.
As well as stitched card pockets I altered small money envelopes.
More pockets
I enjoyed incorporating short or narrow pieces of card as a page, giving a hint of whats coming.
A scrap of canvas makes an ideal pocket for some mini tags.
A vellum pocket
A vellum envelope
Tabs were also used to create detail inside.
Incorporating an altered slide frame.
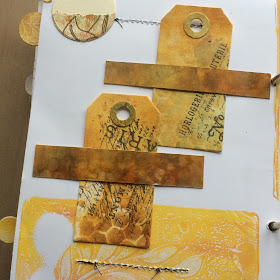
I used strips of card as another way of holding a tag in place, either glued or stapled.
The background on this page is a piece of cotton stained with wax and rust patches....results of a previous experiment.....or maybe it was an accident!
On these pages I used lace as a tag holder.
Using book text can break up blocks of strong colour and very useful at the edge if the adjoining page is a short one as the text is neutral and will compliment the page.
A trimmed down index card above and the other side of it below trimmed with cotton tape. The gelli print background just seemed perfect for some more K&Co.
Overlapping several elements and connecting them gives cohesion and grounds them on the page.....nearly there now.
Last but not least another bistre page. These were A4 sheets of cartridge paper cut in half and then turned around to create some white space in the middle.
And breathe....congratulations you've finished the journey!
Well there may have only been a couple of posts from me recently but I've hopefully made your visit worth while this time. Thanks so much for stopping by and hope to see you soon. Ruth x


