Hi everyone, it's time for our next challenge at
Stamps and Stencils and as it's our 6 'monthaversary' we're also having a blog hop. If you've arrived here from
Yvonne's blog you're in the right place... if you haven't and you want to join in then hop across to Stamps and Stencils for the details. There's also a PaperArtsy giveaway for one lucky hopper!
On to this months challenge then,
Sue our talented DT lead is our host this time around and the theme she's chosen is
'Whatever it is make it 3D!'. Here's my altered tin.
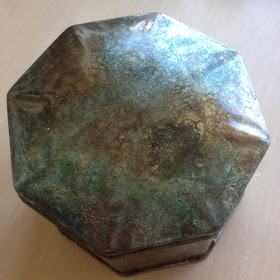
I decided to alter an old tin I picked up in a charity shop that I thought had an interesting shape and set about burning it ...
see this post for more details.
You can just about make out the original design on the lid which was oriental in look and in quite garish colours. However the sides post burning I just fell in love with...happy accident!
Building on that I decided to use alcohol inks sponged over the tin with more on the top than the sides.
I didn't want to add anything more to the tin itself and decided I'd have fun creating a floral embellishment for it.
Stamps and stencils were used on a variety of surfaces.
This is PaperArtsy crunchy waxed Kraft paper with silk glazes brushed on top and heat set...I've used paint before and it doesn't blister just seals it it, but the glaze was another happy accident ...love the blistered effect.
The reverse of the paper with primary elements sprayed and heat set, this won't rub off now, plus some archival stamping.
This is white Khadi paper (cotton rag paper) sprayed with black glimmer mist (another lost and found product since my craft room makeover) with burnt umber primary elements mixed into 3D gloss gel.
The last surface is clearly for art film stamped with the bubble stamp. I used the tattered florals die to create my flower just layering up and adding some mica flakes to the centre.
This was one of those projects that was a joy to create, happy accidents, quite simple and just came together beautifully.
The inside which is how I expected the outside to initially look...not sure what I'm going to store in it yet!
A few detail photos.
Hope you'll be inspired to join and hope you'll hop across to
Julia's blog, but before you go you also need a letter from me which is
'C'.
As always thanks for visiting... Ruth x


